
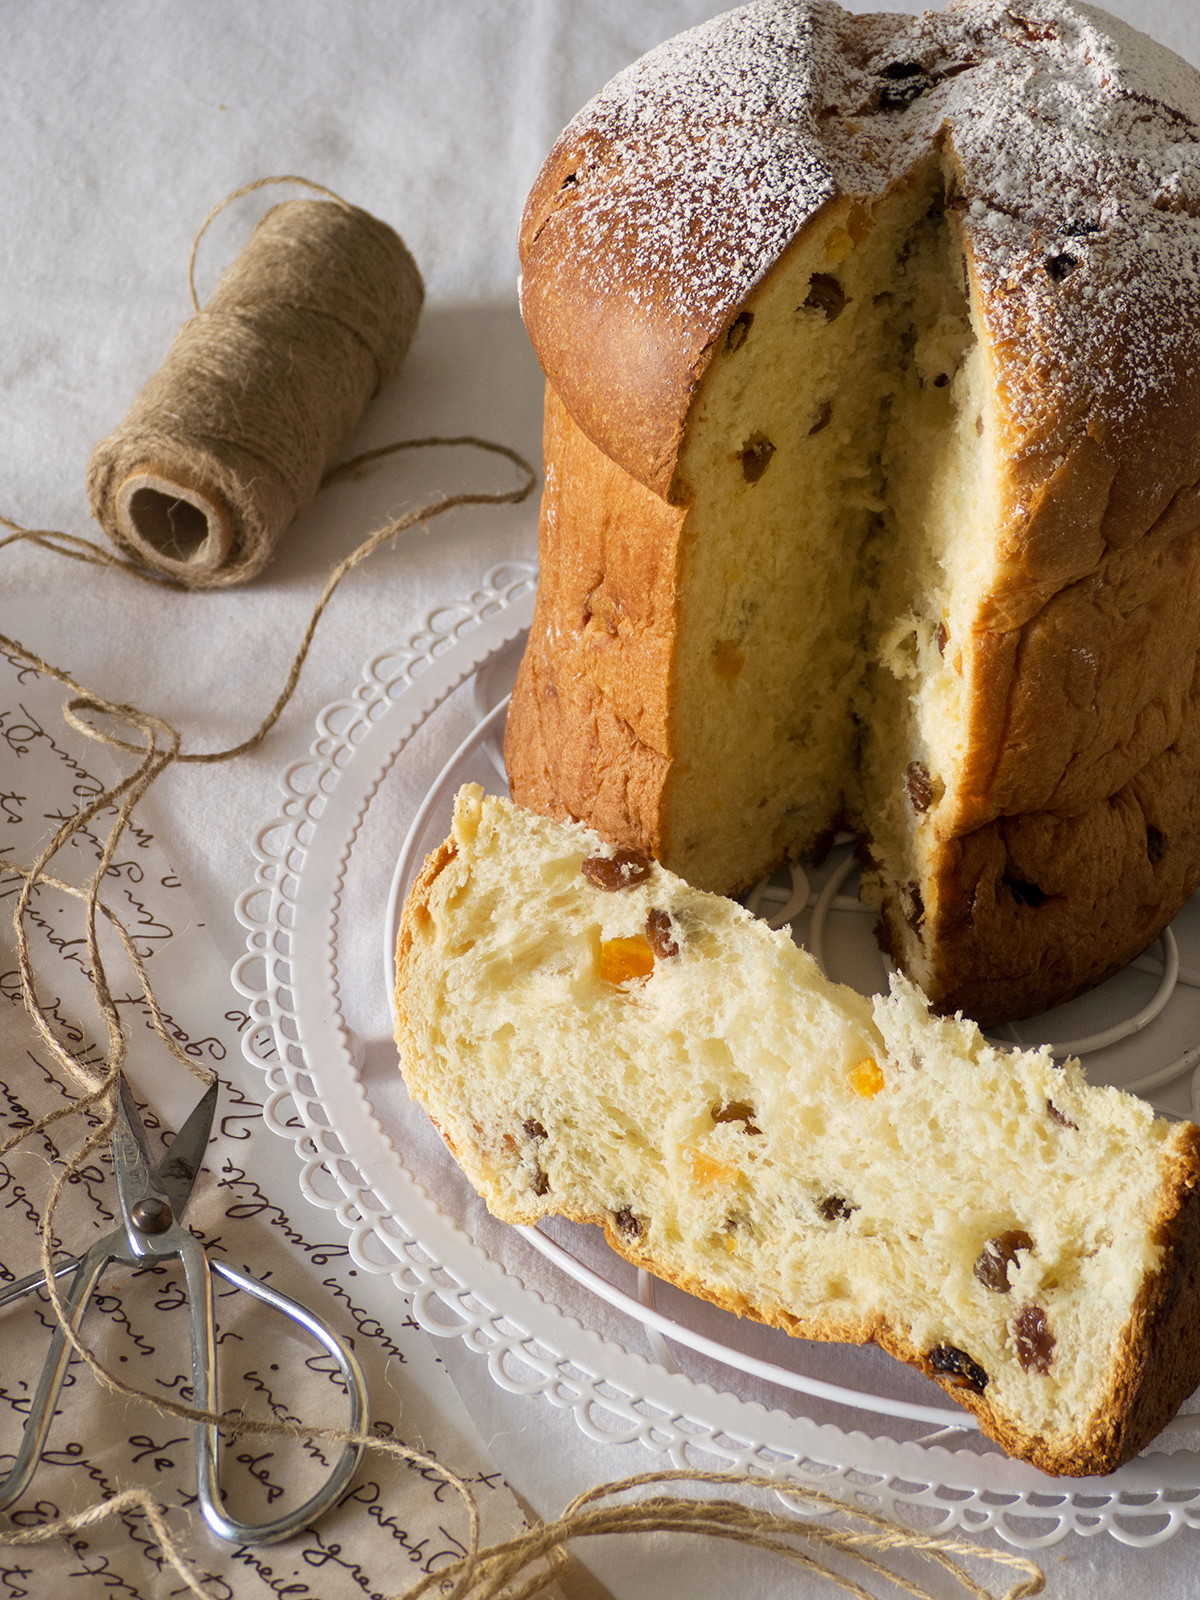
If there is a typical sweet bread of the Christmas holidays, it is undoubtedly panettone. Rosa, author of Pemberley Cup&Cakes, brings us the traditional panettone recipe, with its classic brioche-style dough and a filling of candied fruit and raisins. The classic Christmas treat, perfect to enjoy with the family and to give as a gift. I strongly encourage you to make it at home!
And once again we’ve reached that time of year when, by just stretching out our hand a little, we can almost, almost touch the doors of Christmas. I must confess that I’m especially excited to celebrate it again with all of you whom I know never miss a date with these pages (regulars and new additions), sharing this time this recipe for panettone traditional, based and adapted (without needing to make a sourdough starter to make it more accessible) of the Milanese panettone of the book Italian bread and pastries of the Simili sisters.
To be perfectly honest, I must warn you that on this occasion, although it is perfectly feasible and possible (and even highly comforting) to carry out the kneading process by hand*, having a electric dough mixer will be greatly appreciated, as the panettone It requires somewhat lengthy kneading and some familiarity with this type of enriched dough with a significant proportion of fat. All in all, I consider this a fairly balanced recipe (there are simpler options and, of course, more elaborate ones), considering the balance between the difficulty level and the result obtained.
Well. Once we've accepted that we'll need at least a minimum of baking skill or flair (and I stress the 'minimum,' because I assure you it's within reach of anyone who truly wants to embrace the experience), we must not forget a factor almost as important as, or even more important than, mastering this or that technique: plan time well in advance. A good panettone it's not something you can do in a minute (or two), so add a good dose of patience and calm to the ingredients and you'll be halfway there. To begin with, it's basically essential that you set aside a whole day; so no plans. For guidance purposes, for these quantities and with an ambient temperature of about 20ºC, I’ve allocated the time (you’ll see that most of it is waiting) as follows:
The eve
- Preferment preparation (5 min.) + proofing (overnight in the refrigerator)
The day in question (a day with no plans)
- Preferment acclimation at room temperature (1½–2 hrs)
- Preparation of the 1st dough (15 min.) + proofing until doubled in size (2 hrs)
- Preparation of the 2nd dough (20 min.) + proof until tripled or quadrupled in size (4¼ - 4½ hrs)
- Baking (40-45 min.)
- Rest (1½ - 2 hrs)
And with that said, I strongly and warmly encourage you to give it a try and treat yourselves to a good panettone homemade these days (and even throughout the year, why not?); once again, all the effort put into the work will be highly rewarded (and if the first one doesn’t turn out to be anything to write home about, you’ll nail the second, I’m convinced).

Bérard Flour Scoop and Birkmann cooling rack.
Ingredients (for 1 medium panettone; approx. 750gr)
All ingredients must be at room temperature, unless otherwise indicated.
For the preferment:
- 40gr of bread flour
- 40ml of whole milk, warmed
- 5gr of fresh baker's yeast
For the 1st kneading
- 40gr of egg yolk (about 2 large yolks)
- 90gr water, lukewarm
- 200gr of bread flour
- 50gr of white sugar
- The previous preferment
- 50gr of unsalted butter
For the 2nd kneading:
- 40gr of whole milk, lukewarm
- 20gr of white sugar
- 3,5gr of salt
- 40gr of egg yolk (about 2 large yolks)
- 5gr (1 teaspoon) of mild honey
- 10ml (2 teaspoons) of aged rum
- ½ teaspoon of pure vanilla extract
- 90 - 115gr bread flour
- The previous dough
- 50gr of unsalted butter
- 120gr of sultana raisins
- 80gr of candied orange peel
To finish:
- Butter
- Powdered sugar (optional)
Preparation
Preparation of the preferment
- In a bowl medium, we dissolved the yeast in the warm milk (about 40-43ºC max.).
- Next, we add the flour and gently mix with a silicone spatula until you get a smooth, thick mixture.
- Next, cover with plastic wrap and let it rise overnight (about 8 hrs.) in the refrigerator.
- The next morning our preferment will have risen and noticeably puffed up (you’ll notice a number of bubbles inside). Remove it from the refrigerator and let it come to room temperature for 1½ -2 hrs.
Preparation of the 1st dough
- To begin, in a small bowl, lightly whisk the yolks with the warm water.
- In the bowl of our electric stand mixer, equipped with the hook attachment (or in a large bowl and the help of a spatula or wooden spoon if we are going to knead by hand*) we add the flour, sugar, and the previous mixture of yolks and water and mix gently until everything is well incorporated, obtaining a more or less uniform dough, although still somewhat rough.
- Next, add the preferment and knead gently until you get a cohesive, more homogeneous dough (for about 5-6 minutes). If kneading by hand*, do this step on a clean work surface. (We must avoid adding more flour even if the dough feels a bit sticky at first; I assure you it will become smoother as we continue kneading. If anything, you can grease your hands with a few drops of sunflower oil).
- Finally, start adding the butter in several batches without stopping kneading, until it is fully incorporated; do not add the next batch until the previous one has completely blended in. Once all the butter has been incorporated, continue kneading a bit more vigorously for about 5-6 more minutes (a little longer if kneading by hand) until you have a smooth, soft, elastic dough that comes away from the bowl (or the work surface) without difficulty. Although it may be a bit messy at first, remember that it’s very important not to add more flour; at most, you can lightly grease your hands again with a few drops of sunflower oil.
- Once ready, we shape the dough into a ball with our hands and place it in a wide bowl, previously greased with a thin film of butter, sunflower oil or mold release spray, we cover well with plastic wrap and let it rise in a warm place away from drafts for as long as necessary until it more or less doubles in volume.
Production dand the 2nd dough
- We grease the inside of a mold for panettone of 16 cm Ø with a thin layer of butter or nonstick spray, we line the sides with parchment paper (ideally it extends a little above the edge of the pan) and grease again over the paper. Lining the inside of the pan with paper is important in this recipe because, although it is nonstick and works perfectly with any type of batter, in this case the sugar that coats the candied fruit included in the panettone it caramelizes during baking and the little pieces that remain exposed on the outside of the dough would stick to the pan, which would make unmolding difficult.
- Next, we add the warm milk, sugar, salt, egg yolks, honey, rum, and the vanilla extract in the bowl of our electric dough mixer, equipped with the dough hook attachment (or in a large bowl, if we are kneading our panettone by hand) and pair well with some handheld rods until you get a uniform mixture.
- Then, without stopping mixing, gradually add the first 90gr of the flour (reserve the remaining 25gr) until it is fully incorporated; you’ll end up with an initial dense, sticky dough.
- We then add the first dough, previously degassed (press it gently with a closed fist inside the bowl two or three times), and begin to knead gently (if kneading by hand, after a few movements in the bowl to combine both mixtures, move to a work surface) until you obtain a new dough that looks uniform and well cohesive. If after a few minutes it is still overly sticky or runny, start adding, teaspoon by teaspoon and without stopping kneading, a little more of the reserved 25gr of flour (you may need to add it all) until it starts to pull away from the bowl (or work surface) without too much difficulty.
- Again, we add the butter in several batches, fully incorporating it between each batch, until it is completely incorporated. Once we have added all the butter, we continue kneading until we obtain a perfectly homogeneous, smooth, and elastic dough. This step will take a bit longer than with other types of dough due to the large amount of fat we’ve added (especially if we’re kneading by hand*). We’ll know our dough is well kneaded when, besides becoming very soft and elastic and releasing easily from the bowl (or work surface), the gluten has developed properly. To check, take a pinch of dough between the thumb and index finger of both hands, stretch it gently, and see whether it forms a translucent, smooth membrane.
- Finally, if we used the stand mixer, transfer the dough now to a perfectly clean work surface and knead by hand for 1 minute or so*. Then stretch it out with your hands, forming an irregular square or rectangle, and scatter the raisins and the candied orange, cut into small pieces, over the entire surface. Roll up the dough, enclosing the fruit inside, and fold it over itself as many times as needed until you’re sure the fruit is evenly distributed throughout the dough. (If some raisins or pieces of orange come loose during this process, work them back into the dough.)
- Next, we round the dough to create good surface tension and place it in the panettone mold (it should not exceed ⅓ of the mold's capacity), cover loosely with plastic wrap, and let it proof in a warm, draft-free place until the top of the dough peeks over the edge of the mold. This part of the process will take several hours (it will always depend on the climate, room temperature, and the size of our panettone), but it will keep growing, so don't lose faith and arm yourselves with patience**.
- Once our panettone has proofed, we then preheat the oven (electric, no fan) to 180ºC with top and bottom heat and place the baking tray on the lower third of the oven.
- Next, with the help of a bread knife or a knife very sharp we make a small cross-shaped incision in the center of the surface of the dough and drop a small knob of butter at the intersection.
- We bake our panettone for about 40-45 minutes, until, when inserting a wooden skewer into the center all the way to the bottom, it comes out clean, with no batter or crumbs. If it starts browning too much, we can loosely cover it with aluminum foil during the last 10 minutes.
- Remove from the oven and let it cool in the pan on a cooling rack for 30-40 minutes until we can handle it comfortably with our hands without burning ourselves. After this time, carefully unmold, remove the parchment paper, and place our panettone laid on the rack, which we have now covered with a couple of clean, folded kitchen towels (folded into quarters is enough). Turn it every few minutes so it doesn’t lose its shape until it’s almost cool; then remove the towels and let it cool completely upright on the rack.
- When serving, we can sprinkle it with a little powdered sugar.
It stays soft for 2-3 days at room temperature, well wrapped in plastic wrap or inside a sealed plastic bag, although nothing like a panettone freshly made.

Wooden cutting board, Nomu vanilla extract, Pallarès carbon steel knife, Birkmann cooling rack and Patisse non-stick panettone mold.
Notes
- *If kneading by hand, with this type of dough it is always advisable to use French kneading. If you are not familiar with this technique, be sure to check out this article where it explains it in great detail "Bread: Kneading Basics and Techniques"
- **If during the proof of the 2nd dough you realize it has gotten too late (especially if making panettones —or panettones— larger), you can place the pan with the dough in the refrigerator overnight. The next morning, take it out of the fridge and let it continue the proofing process at room temperature; it will take a bit longer, but it will eventually perk up and keep rising normally.
- Although a bit less traditional, nothing stops you from replacing the raisins with chocolate chips; panettone for all tastes.
- If it turns out you couldn't keep up and you ended up with some slightly dried leftovers of panettone, don't forget that you can always enjoy it again by preparing a real French toast (replace the roscón in the recipe "French toast" for your remains of panettone), thus making it a whole new, highly recommended experience.
- You'll also like to know that the panettone Freezes well for up to 2 months when tightly wrapped in plastic wrap and aluminum foil.
- And while we're at it, why not double the quantities and make extra to give as gifts?
And that said, have you already set a date on the calendar to start preparing your own panettone homemade?
Regards,
Pink


Comments
Concepción said:
Lo he hecho y ha quedado muy rico, lo único es que, al hacer el corte en el centro después del levado se me ha quedado hundido en el centro y es una pena porque estaba precioso. En el horno no se ha recuperado y se ha quedado así. ¿Algún truco para que no pase?
Juan antonio said:
Lo primero de todo gracias por la receta.
Un par de dudas me han surgido al hacerlo, me ha quedo bastante seco por dentro, será exceso de cocción o que algo no he hecho bien.
También lo rellene de chocolate y se me h quedado todo abajo, al levar la msa no subió ninguna pepita de chocolate
Cristina said:
Hola! Tengo molde metálico para panettone. Lo de pincharlo.para que enfríe boca abajo por tanto no valen. Cómo se haría en este caso? Es como explican en la receta? Muchas gracias
Mauro said:
Excelente receta, perfectamente explicada.
El panettone ha quedado fantástico.
Muchas gracias !
Rosa said:
Hola Paqui. Te saldrá perfectamente; sólo habrás de dejarlo enfriar por completo boca abajo y suspendido tan pronto lo saques del horno (normalmente se atraviesa por ambos lados a unos cm de la base con un par de brochetas de madera).
Felices fiestas y espero que lo disfrutes! :)
Paqui llamas said:
Hola…quiero hacer la receta de pannettone.
No tengo molde…puedo utilizar un molde normal?
Me saldrá bien?
Gracias
Claudia said:
Hola María, lo lamento pero no tenemos experiencia en la thermomix. Lo único que puedo sugerirte es que entres en nuestro grupo de Facebook (https://www.facebook.com/groups/CocinarConClaudiaAndJulia/about/) y lo plantees allí, a ver si pueden ayudarte. ¿Qué te parece la idea? Sino siempre tienes también el grupo de Velocidad cuchara, más expertos que ellos en la Thermomix no hay :) Saludos!
Claudia said:
Happy to hear that, Geraldine! Many thanks, kind regards!
María said:
Podría amasarse con thermomix y como se haría, por favor? Gracias.
Geraldine Gibson Toltschin said:
This is a fine recipe. I have made many pan Dulces in my life in my Bakery in Buenos Aires and Puerto de Santa Maria.
You have inspired me to whip into action with your recipe.
Merci, Geraldine