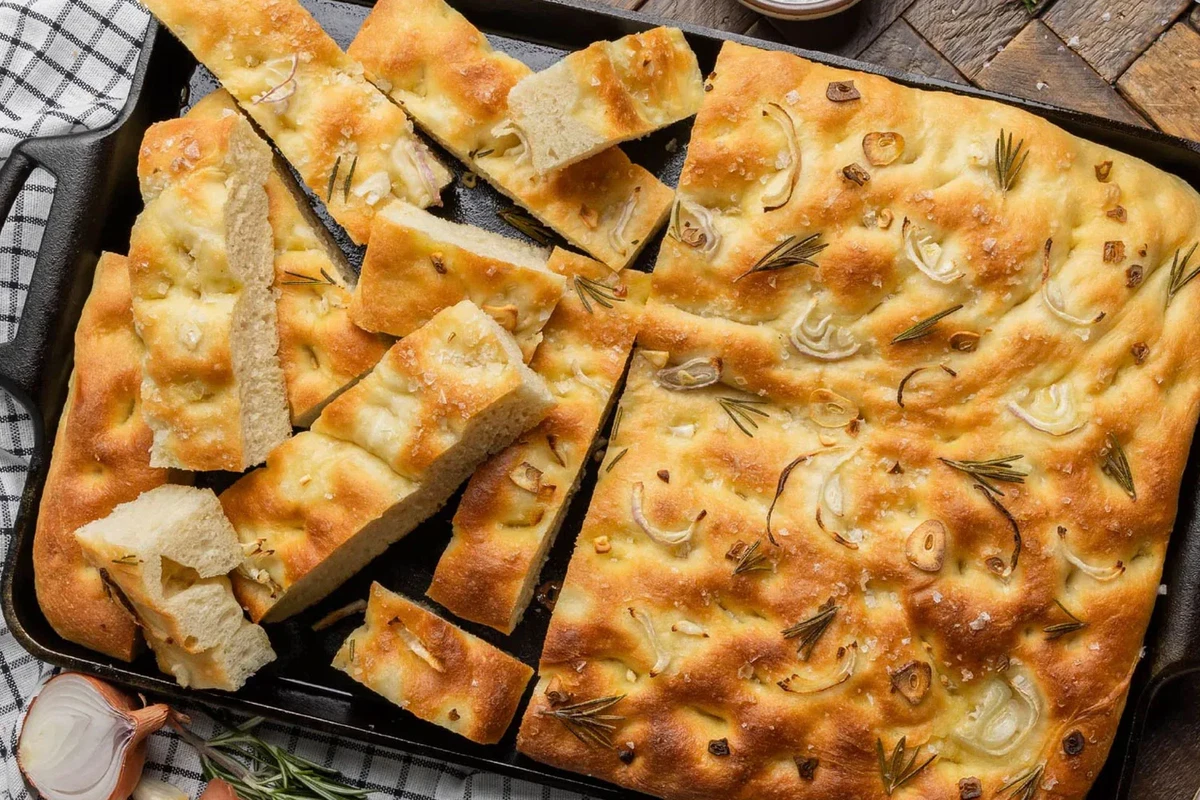
Yes, I know it's summer and it's hot. I also know that just thinking about turning on the oven makes you want to fan yourself, but I assure you that when you try this onion and roasted garlic focaccia you'll forget about the 250º C it needs to bake at, because you'll want to make it again at the first opportunity. That's why I wanted to share this recipe today — it's well worth making without wasting a minute, even in the middle of a heat wave.

You'll see that this focaccia has a particular touch that gives it an extra layer of flavor. We have added a head of roasted garlic to the dough and the result is a complete success. If onion focaccia, seasoned with rosemary, salt and EVOO is a delight, roasted garlic in the dough makes it even better. As is, right out of the oven once it cools a little, it's perfect. But if you add a thin slice of mortadella from Bologna with a bit of burrata and an extra drizzle of EVOO, it's almost perfection.

To make it bake faster, we'll bake it in the Lodge cast iron tray, which is a perfect pan for achieving luxurious results with this type of dough. Its heat retention is excellent and because it distributes temperature wonderfully, the result is a more even and faster bake. And when you see how crispy the base turns out, you'll make it again at the first chance, whether it's winter or summer!

Are you up for turning on the oven? Let's get to the recipe for the crispiest onion and roasted garlic focaccia you'll ever try!


Ingredients

For the dough

  • 1 and 3/4 cups warm water, about 43 °C (approx. 414 ml)
  • 1 teaspoon honey
  • 2 and 1/4 teaspoons active dry yeast
  • 4 cups all-purpose flour (approx. 500 g)
  • 2 teaspoons salt
  • 1 head roasted garlic*
  • 2 tablespoons EVOO

*You can see how to roast garlic here. You'll also see how to store it and use it in other recipes.

For the topping

  • 1/4 cup EVOO (approx. 59 ml) to oil the iron pan
  • 2 tablespoons EVOO
  • 1 tablespoon flaky sea salt
  • 3 garlic cloves thinly sliced
  • 1 medium shallot thinly sliced
  • A few sprigs of fresh rosemary

Preparation

  1. Put the water with the honey and yeast in a bowl and stir gently to combine. Let rest for about 5-10 minutes, until you see it bubbling and foamy.
  2. Now put the flour and salt in the bowl of your KitchenAid stand mixer and attach the dough hook. Make a well in the center, add two tablespoons of EVOO and pour in the previous mixture (the water with honey and yeast). Mix the ingredients and knead on medium-low speed until a dough with a fluffy appearance forms.
  3. Remove the roasted garlic cloves from the head by pressing slightly from the bottom, and add them to the dough.
  4. Now raise the mixer speed slightly to medium-high and knead for another 3-5 minutes so the roasted garlic is incorporated and you get a soft dough that easily pulls away from the sides of the bowl.
  5. Place the dough in an oiled bowl and cover it with plastic wrap. Let it rest in a warm place until it doubles in size (at about 24-26 °C it will take between 1 and 2 hours). For better flavor, you can let the dough ferment cold in the refrigerator overnight.
  6. If the dough has rested cold, the next day take it out of the fridge and let it come to room temperature for about 1 hour, until it reaches ambient temperature. If you fermented at room temperature, it will be ready once it has doubled in volume.
  7. Meanwhile, generously oil the Lodge iron baking pan to help the crust become much crispier.
  8. Deflate the dough slightly and transfer it to the iron pan. Gently press the dough with your fingertips to stretch it across the pan. If the dough resists, let it rest a few minutes so you can stretch it easily. After you've stretched it, let it rest about 15-20 minutes to relax and expand.
  9. Preheat the oven to 250º C.
  10. Drizzle the dough with the 2 tablespoons of EVOO. Using your fingertips again, press the dough lightly to distribute the oil.
  11. Sprinkle with the flaky salt and gracefully scatter the rosemary sprigs, garlic slices and shallot slices over the dough.
  12. Place the pan in the oven and bake for 15-20 minutes, until the surface is golden and the edges look golden and crispy.
  13. Remove the focaccia from the oven and let it cool for 5 minutes, without unmolding, on a rack.
  14. Take the focaccia out of the pan and let it cool a bit before slicing.


Leave a comment

Roasted Onion and Garlic Focaccia

Yes, I know it is summer and it is hot. I also know that just thinking about turning on the oven makes you want to fan yourself, but I assure you that when you try this roasted onion and garlic focaccia, you will forget about the 250º C temperature it needs to bake, because you will want to make it again at the first opportunity. That is why I wanted to share this recipe today, because it is well worth making without wasting a single minute, despite being in the middle of a heat wave.

You will see that this foccacia has a special touch that gives it an extra depth of flavor. We have added a head of roasted garlic to the dough, and the result is a complete success. If onion focaccia, seasoned with rosemary, salt, and EVOO, is delicious, the roasted garlic in the dough makes it even better. Just as it is, as soon as it comes out of the oven and cools slightly, it is perfect. But if you add a thin slice of Bologna mortadella with a little burrata and an extra drizzle of EVOO, it is almost perfection.

To make it quicker to bake, we are going to cook it in the Lodge cast iron baking tray, which is a perfect pan for achieving excellent results with this type of dough. Its heat retention is excellent, and because it distributes temperature wonderfully, the result is more even and faster baking. And when you see how crispy the base turns out, you will make it again as soon as you get the chance, whether it is winter or summer!

Ready to turn on the oven? Then let us get to the recipe for the crispiest roasted onion and garlic focaccia you will ever try!

Author
Claudia&Julia
Prep Time
15 minutes
Cook Time
20 minutes
Servings
6
Category

Baking

Ingredients

  • 1 and 3/4 cups lukewarm water, at about 43 °C (approx. 414 ml)
  • 1 teaspoon honey
  • 2 and 1/4 teaspoons active dry yeast
  • 4 cups all-purpose flour (approx. 500 g)
  • 2 teaspoons salt
  • 1 head of roasted garlic* 
  • 2 tablespoons EVOO
  • 1/4 cup EVOO (approx. 59 ml) to grease the cast iron tray
  • 2 tablespoons EVOO
  • 1 tablespoon flaky sea salt
  • 3 garlic cloves, thinly sliced
  • 1 medium shallot, cut into thin slices
  • A few sprigs of fresh rosemary 

Directions

  1. Put the water, honey, and yeast in a bowl and stir gently to combine. Let it rest for about 5-10 minutes, until you see it bubbling and foamy.
  2. Now put the flour and salt in the bowl of your KitchenAid mixer and attach the dough hook. Make a well in the center, add two tablespoons of EVOO, and pour in the previous mixture (the water, honey, and yeast mixture). Mix the ingredients and knead at medium-low speed until a fluffy-looking dough forms.
  3. Remove the roasted garlic cloves from the head by pressing gently from the bottom, and add them to the dough.
  4. Now increase the mixer speed slightly to medium-high and knead for about 3-5 minutes more, so the roasted garlic is incorporated and you have a smooth dough that pulls away easily from the sides of the bowl.
  5. Place the dough in an oiled bowl and cover it with plastic wrap. Let it rest in a warm place until it doubles in size (at about 24-26 °C it will take between 1 and 2 hours). For better flavor, you can cold-ferment the dough in the fridge overnight.
  6. If the dough has rested in the fridge, the next day take it out and let it come to room temperature for about 1 hour. If you let it ferment at room temperature, it will be ready once it has doubled in volume.
  7. Meanwhile, generously grease the Lodge cast iron baking tray to help make the crust much crispier.
  8. Gently deflate the dough and transfer it to the tray. Press the dough gently with your fingertips to stretch it across the entire tray. If you see the dough resisting, let it rest for a few minutes so it stretches easily. Once you have stretched it out, let it rest for about 15-20 minutes so it can relax and expand.
  9. Preheat the oven to 250º C.
  10. Drizzle the dough with the 2 tablespoons of EVOO. Using your fingertips again, gently press the dough to distribute the oil.
  11. Sprinkle with the flaky salt and arrange the fresh rosemary sprigs, garlic slices, and shallot slices nicely over the dough.
  12. Place the tray in the oven and bake for 15-20 minutes, until you see the surface is golden and the edges look golden and crisp.
  13. Remove the focaccia from the oven and let it cool for 5 minutes, without unmolding it, on a wire rack.
  14. Remove the focaccia from the tray and let it cool slightly before cutting.