
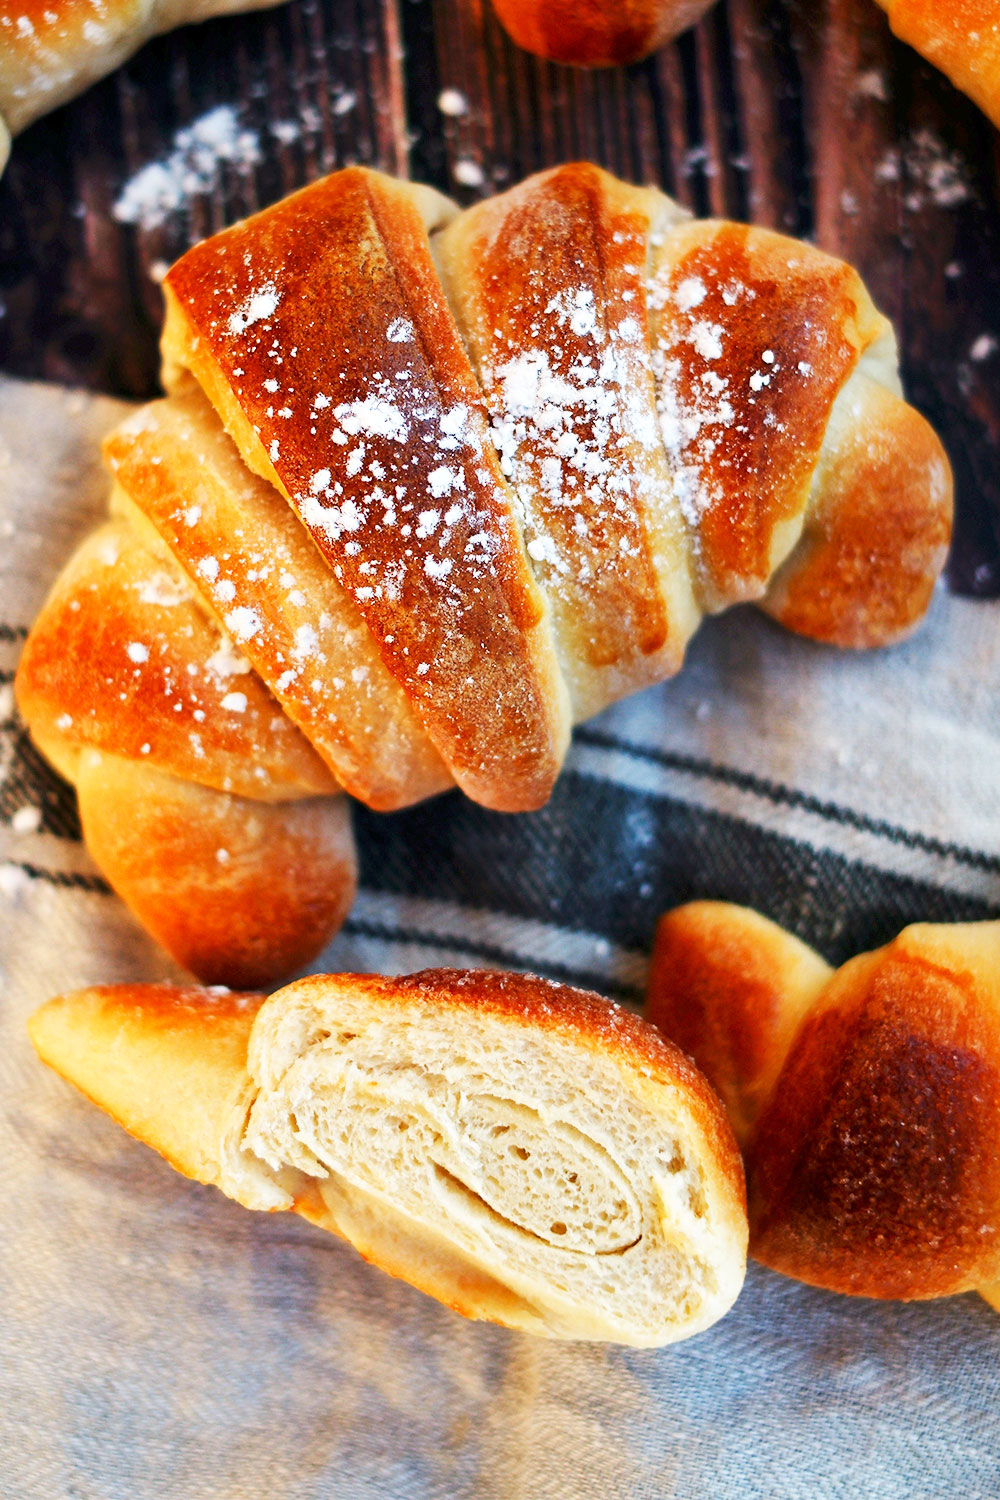
I am in love with brioche dough. It's sweet, light and soft and totally doable at home. What I was dying to find was the perfect recipe to make brioche croissants, and I've definitely found it! It's an easier croissant to make than the traditional one, also different in flavor and texture, and delicious.
The National Croissant Day is coming up on January 30th, and since the croissant has always been one of my favorite snacks (simply paired with a few squares of chocolate it's unmatched), I wanted to pay tribute to it properly.
So after many trials, some disappointments, several successes and lots of enthusiasm, I got closer and closer until I found this recipe for making delicious Brioche Croissants. Here is the step-by-step with photos to make these croissants and some considerations I hope help you enjoy them in many ways.
In this case I made 6 very large croissants, but I'll tell you in the recipe how to cut the dough to make 12 medium croissants.

Why make brioche croissants
In recent months I've been finding bakeries and pastry shops with brioche croissants in their displays. Yes, brioche croissants are trendy: incredibly tempting and with the body of such a delicious dough, I needed to find the recipe to make them, because besides loving them endlessly, brioche dough is very easy to make. These homemade croissants are among the easiest you can make at home, among the homemade croissants where you develop the dough yourself.
What I love about brioche croissants is that since the dough isn't overly sweet, they accept many uses: they're good on their own; if you want to enjoy them at a sweet breakfast you can pair them with butter, chocolate or jams; and if you'd like to have them savory, you can fill them with ham, cheeses, tuna... They're also ideal as a savory breakfast.
By making homemade croissants, natural, without additives or preservatives, the croissants will keep well for two to three days (although believe me they will fly off the first day!).
NOTE: If instead of brioche croissants you want to make traditional croissants, you'll find the recipe here.

Ingredients
- 70 + 100 ml of whole milk
- 18 gr of fresh yeast
- 500 gr of strong flour
- 1 teaspoon of salt
- 3 medium eggs (140 gr)
- 90 gr of white sugar
- 130 gr of softened butter
Also, have on hand:
- Flour for dusting
- Egg for brushing
- Half a glass of water and 4 tablespoons of white sugar for the final touch of sweetness (or powdered sugar for dusting)
Preparation
Prepare the dough:
- Warm a little of the 70 ml of milk, slightly and without letting it burn.
- Put the fresh yeast into the milk and stir. Let it dissolve and set aside.
- Pour the 500 gr of flour, the teaspoon of salt, the eggs and the sugar into the bowl of the KitchenAid stand mixer and turn on at speed 2 with the hook attachment.
- When the eggs start to be mixed into the dough, add the reserved milk with the yeast and the remaining 100 ml of milk.
- Increase to medium speed and let a dough form. It will be quite dry and firm. It's time to add the butter.
- Cut the softened butter (neither cold nor melted) into cubes and add a third of it to the dough. Wait until it's practically incorporated and add the next third. Finally, when that's incorporated as well, add the rest.
- Now it's time to knead, rest and knead. Several times, because the dough's gluten must develop and you need to achieve a smooth dough: knead for 12 to 15 minutes and let the dough rest a couple of minutes. Knead again 5 more minutes and let it rest. Repeat if needed, until the dough is ready and elastic.
- When it's ready, brush the bowl with oil and let the dough rest covered with a cotton cloth in a warm place*, until it doubles in volume (around 1.5 to 2 hours).
*I usually turn the oven on to 40º while I prepare the dough, and turn it off when I'm finishing with it. It's a great place to let the dough rest, the heat the oven retains during that time helps the dough rise quickly.

Wombat cotton cloth by Maxwell and Williams
Shaping the croissants
- When the dough has doubled in volume, pour it onto a clean, floured surface.
- Remove the air by pressing with your knuckles and roll the dough out with the help of a rolling pin, forming a rectangle**.
- With the help of a bench scraper, cut the dough transversely several times (as in the photo), thus forming triangles.
- At the base of each triangle, make a cut not too long; it will help separate the "bañas" when shaping the croissant.
- Now you must shape the croissant: take the first triangle, slightly separate the ends of the base and start twisting it over itself, rolling the entire triangle up to the tip. Twist the tips if you want to make those characteristic "bañas" of the croissant, or leave it untwisted if you want a straight croissant.
- Shape croissants with the rest of the dough triangles you have, and place them on a baking tray (I used the Nordic Ware Naturals tray, which is very spacious, with the De Buyer perforated silicone baking mat).
- Cover with a cotton cloth and let rest for half an hour, so the dough relaxes again.
**I chose to make large croissants. Mine were really very large; I made only 6 units with a very generous amount of dough. I recommend rolling the dough more (making a longer rectangle so you can make more triangles), or cutting the rectangle in half lengthwise, so from each half you can make 6 triangles and thus obtain 12 medium croissants.

Baking the croissants
- Preheat the oven to 170 ºC.
- Brush the croissants with beaten egg and put them in the oven, with heat on top and bottom but the tray placed rather low in the oven.
- Wait for them to bake. It will depend on the size of the croissants you made; they may take more or less time, but don't stray, they can be done in 15 or 20 minutes.
- (Optional) When they start to turn golden, mix 3 or 4 tablespoons of sugar in half a glass of water, and brush the croissants generously with the mixture. This will give not only more shine but also that characteristic sweet touch of croissants. If you prefer to leave them without this touch simply omit this step, and you can dust the croissants with powdered sugar once baked, or leave them plain.
- Let the croissants cool on the tray before serving.

How to flavor or fill your croissants
If you like, you can flavor the croissants:
- if you enjoy brioche with a vanilla note, add a tablespoon and a half of vanilla extract to the dough when you incorporate the milk;
- if you want to make lemon- or orange-flavored croissants, add the zest of those citrus fruits to the dough and a couple of tablespoons of their juice.
- It's also interesting to make these croissants with coconut flavor: add 3 tablespoons of coconut oil and half a cup of shredded coconut.
You might be thinking about making chocolate brioche croissants. In that case you have several options:
- Add a cup of chocolate chips to the dough (it's not the best option in my opinion when we shape the brioche into a croissant, but it's certainly a very convenient option).
- Place one or two squares of chocolate inside the dough: put them right when you finish the small cut you made in the dough, so when you roll the dough the chocolate will be inside. Don't overdo the chocolate or it will spill out when it melts in the oven.
- You can also insert white chocolate, or cocoa-hazelnut spread if that's what you like at home.
- You can make cocoa brioche dough: add a cup of cocoa powder to the dough when preparing it (in that case, I encourage you to also add a few tablespoons of coconut oil to the dough, which besides helping to incorporate the cocoa pairs wonderfully with the chocolate flavor).

Other things to keep in mind
- Remember what was mentioned about the number of croissants: I recommend making double the amount simply by cutting the rectangular dough in half, thereby obtaining twice as many triangles afterwards.
- Store the brioche croissants in a cotton bag or a storage jar. Here you will see many containers ideal for that.



Comments
Claudia said:
Hola Luz, me parece estupendo! A por ellos entonces con un relleno de pasas y canela, ¡Qué rico! SAludos!
Claudia said:
Hola Virginia, qué feliz me haces!! me alegro mucho, la verdad es que si se tiene paciencia a amasar bien la masa, el resto es pan comido y quedan deliciosos. ¡Gracias!
Luz said:
Tienen una pinta estupenda, se me ha ocurrido que voy a ponerle el relleno de los cinamonn roll , seguro que le pega. muchas gracias!
Virginia said:
¡Receta terminada y han quedado divinos! En casa ya me piden que vuelva a hacerlos, gracias por la receta y el detalle, he seguido el paso a paso tal cual y ha ido perfecto. Saludos y a por más recetas!
Claudia said:
Hola Verónica, la plancha que hice medía aproximadamente 40 cm de largo por 30 de alto. Así pues, si vas a hacer dos rectángulos, al cortar la plancha por la mitad deberían hacer, cada uno de ellos,unos 40 de largo por 15 de alto, para ir cortando entonces los triángulos de unos 15*10cm cada uno. espero que salgan riquísimos! Muchas gracias y un saludo,
Claudia
Claudia said:
Hola Mercedes, me alegro de que te hayas animado con la receta. Espero que salieran bien. ¡ya me contarás! Un saludo,
Claudia
Claudia said:
Hola José, muy buena pregunta. La masa la estire para que tuviera un grosor de aproximadamente 3 – 4 mm.
En cualquier caso, espero que las fotos ayuden son hechas justo después de estirarla.
Un saludo, Claudia
Verónica said:
Me apetece muchisimohacer esta receta pero tengo varias dudas.
¿ El peso de los huevos es con cáscara?
Para hacer 12 cruasanes,¿Que tamaño aproximado tendría que tener el rectángulo? No quiero, ni pasarme de fino ni que me quede demasiado gorda la masa.
Gracias por la ayuda u por compartir esta deliciosa receta.
José said:
Hola. Me gustaría saber el grosor aproximado que debemos dar a la plancha una vez estirada con el rodillo, para hacernos una idea de cómo deben ser las piezas a sacar, no sea que las hagamos demasiado grandes.
Gracias.
Mercedes said:
HOla Claudia, gracias por esta receta y tus explicaciones.- Mañana mismo, sábado, me pondré a hacerla porque me parecen estupendos y no tan complicados como los de hojaldre.-
Ya te comentaré cómo han salido.- Un abrazo
Claudia said:
Hola Natalia, me alegro que te haya gustado la receta, y te invito mucho a hacerla. Sobre el amasado, yo lo he hecho todo en KitchenAid, es práctico. Pero si no dispones de él o te gusta amasar a mano puedes hacerlo manualmente. Lo que quería decir en mi texto es de amasar-reposar-amsar varias veces, el resutlado tiene que acabar siendo el mismo (una masa lisa), ya sea a mano o a máquina (si es a máquina, siempre con el accesorio gancho). A tener en cuenta solamente que si es manualmente requerirás de tiempos más largos de amasado, pues la fuerza y regularidad de la máquina te acorta el proceso. Cualquier cosa me comentas. Saludos y feliz fin de semana Claudia
NATALIA said:
Buenos días
Me ha llamado la atención esta receta y quería prepararla
Cuando dices amasar, lo haces en la misma Kitchen varias veces? O, a mano todas ellas?
Gracias