
Many of you were eager to have another cake recipe in a casserole. We had already made some in them, and they turn out so fantastic that we couldn't help but repeat. Today's one is brought to us by Rosa (Pemberley Cup&Cakes), and yes, it tastes as good as it looks. Enjoy!
I've always been fascinated by casseroles full of provisions, put on the stove with their rhythmic chug-chug from the early hours of the day, releasing those irresistible, often mysterious aromas, all morning until lunchtime.
As a child I could spend a long time lost in thought, watching how my mother or grandmother filled them with countless ingredients, sometimes unknown to me, as they cleaned, chopped, or prepared them as needed. It seemed like anything could fit inside!
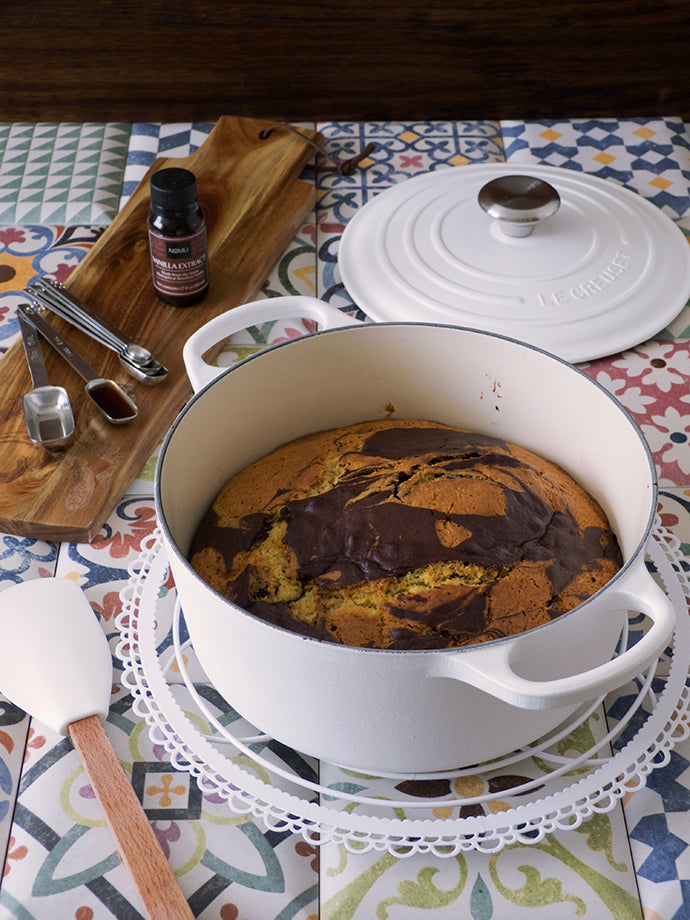
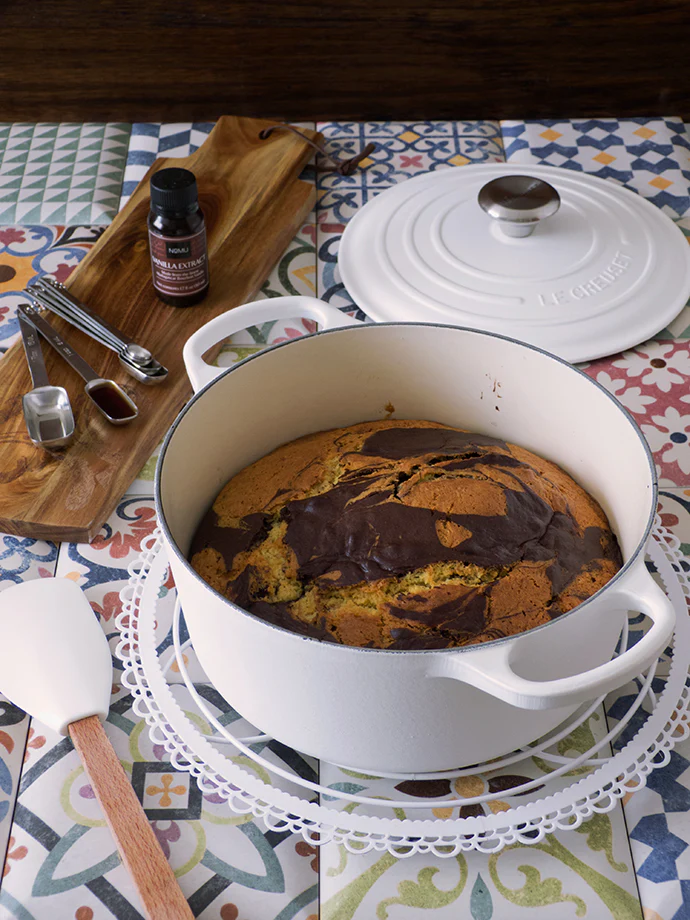
Le Creuset round cast-iron cocotte, MasterClass baguette board, Kitchen Craft Measuring Spoon Set, Birkmann cooling rack and Madagascar vanilla extract
Later, no longer so small, with the rush to experience everything quickly, those sensations became somewhat dormant. However, once the inevitable urgency of those wonderful years passed, they awoke again. And there were the Le Creuset cast-iron cocottes, which simply reconquered my love for Cooking with a capital C.
Most of their virtues are obvious at first glance, but the list is practically endless. If you've already experienced them, you know exactly what I mean. If you still have some doubts about their performance, I strongly recommend you try one (or take a look at this post) and it will answer all your questions; the only and most difficult decision will be choosing the color —the range is almost as wide as their advantages— and on that you're on your own.
But today I'm not bringing you any ancient stew that requires long hours of dedication, but a very simple cake, though by no means even a bit monotonous. The versatility of these cocottes is one of their main attractions.
Marble cakes are irresistible to me. That whimsical design, almost impossible to predict until you start slicing and discovering new patterns with each cut, always holds its own mystery. Honestly, if you aren't careful and it happens like it did to me, after the first slice another one or two might disappear just to see how the next one will reveal itself.
Before leaving you with the recipe, here's a simple yet important reminder: whenever we use our casserole in the oven, we must keep in mind that it's not a conventional mold; sudden temperature changes could damage it, so we will preheat it at the same time we turn on the oven (even before adding our cake batter, as is the case here). And don't lose sight of all the essential tips to maintain our casserole impeccable until the last day and even after.
Ingredients (for a 24 cm Ø round casserole; 12-14 servings)
(All ingredients should be at room temperature unless otherwise stated)
• 80ml semi-skimmed milk
• 45gr unsweetened pure cocoa powder, sifted
• 325gr plain wheat flour
• 1 ½ teaspoons baking powder (like Royal)
• ½ teaspoon baking soda
• ½ teaspoon salt
• 225gr unsalted butter
• 250gr white sugar
• 4 eggs (L)
• 1 teaspoon pure vanilla extract
• 180gr plain Greek yogurt, unsweetened
• Icing sugar for decoration (optional)
* 1 tablespoon=15 ml ; 1 teaspoon=5ml *
Preparation
1. Preheat the oven (conventional electric, no fan) to 200ºC with top and bottom heat and place our 24 cm Ø casserole without the lid on the middle rack of the oven.
2. Before starting to combine the ingredients, it is very important to have them all at hand, previously weighed or measured and at the proper temperature, because once we begin there is no time to lose if we want to obtain a properly baked cake with a perfect crumb.
3. While the oven and casserole preheat, in a small saucepan gently warm the milk over low heat until it starts to steam or little bubbles appear around the edges, barely 1 minute. Remove from the heat, add the cocoa, previously sifted, and stir with a whisk whisks until completely combined. Let cool.
4. Meanwhile, in a large bowl sift together the flour, baking powder, baking soda, and salt. Set aside.
5. In another large bowl (if using an electric mixer, attach the paddle accessory), beat the butter with the sugar vigorously for about 4-5 minutes until you obtain a fluffy texture with a visibly paler appearance.
6. Next, add the eggs, always one at a time and lightly beaten beforehand, and mix gently; do not add the next until the previous one has been fully incorporated. At this point the mixture may look “curdled,” but everything is fine; as you continue mixing the remaining ingredients, the batter will become perfectly cohesive.
7. Then add the vanilla extract and mix until combined.
8. Finally, incorporate the reserved dry ingredients mixture (step 4), alternating it with the yogurt as follows (amounts are approximate): start by adding ⅓ of the dry ingredients, ½ of the yogurt, ⅓ of the dry ingredients, the remaining ½ of the yogurt and the last ⅓ of the dry ingredients, mixing just enough after each addition so that everything is more or less integrated, but without overmixing or the crumb will become dense and not very fluffy.
9. Now divide the batter into two parts, one slightly larger than the other (no need to be too precise here; 60-40 is fine), add the milk-and-cocoa mixture to the smaller portion and fold with a spatula just until you achieve a uniformly colored mixture.

Le Creuset round cocotte, vanilla extract, measuring spoons and Birkmann cooling rack
10. Then remove the casserole from the oven using oven mitts or a couple of kitchen towels, place it on a rack or heat-resistant surface and, being very careful not to burn yourself, grease the inside by applying a thin film of butter with the help of a pastry brush with a long handle (or with baking spray).
IT IS VERY IMPORTANT TO WORK WITH SOME SWIFTNESS FROM THIS POINT ON, AS THE CASSEROLE WILL BE VERY HOT AND LETTING THE BATTER REST EXCESSIVELY INSIDE THE COCOTTE OUTSIDE THE OVEN COULD END UP RUINING OUR CAKE.
11. Once the casserole is ready, start by adding a more or less generous tablespoon of white batter in the center. On top of it, place another tablespoon of cocoa batter and then another of white batter, always alternating both batters until you finish them. We must ensure at all times that they don't mix too much and that they remain well alternated and distributed throughout the inside of the vessel.
A very useful and practical way to portion the spoonfuls of batter in this type of cake is to have a pair of ice-cream scoops; you'll control the amount of each batter at all times and work as quickly and cleanly as possible.
12. Once all the batter has been added, run a skewer or a small spatula through the batter making a few random grooves to achieve that marbled effect. Finish by tapping it very gently against the kitchen counter, always over a folded towel between the casserole and the surface, so the batter settles well and any air bubbles inside are expelled.
13. Reduce the oven temperature to 180ºC and bake without the lid for about 45-50 minutes until the center is fully cooked (after the first 40 minutes we can start checking how the cake is doing; we know each oven has its own rhythm). To ensure it is properly baked, insert a skewer into the middle of the cake and check that it comes out clean of crumbs. If not, check every 3 or 4 minutes until it does.
14. Once our marbled cake has baked properly, remove the casserole from the oven, place it on a cooling rack and let the cake cool completely inside before unmolding and slicing it (always in that order; see the Notes section below). If we've greased the inside well, it will unmold without any difficulty; in fact, as it cools, we'll see the cake releasing from the inside of the vessel by itself. Even so, before unmolding, it's a good idea to shake the casserole with the cake very gently until you notice it has fully detached to achieve a perfect release.
15. If desired, dust a little icing sugar over the cooled cake before serving.
It keeps at room temperature for 3-4 days well protected from air (we can even keep it inside the casserole closed with its lid).

Chemex coffee maker, Le Creuset cups and Tokio Design Textured porcelain plates
Notes:
- Whenever we cut our cakes, preferably use a long serrated knife that is well sharpened; this way we will obtain clean, precise slices without crumbling the cake.
- We can also use a casserole of a smaller diameter (22 cm Ø, for example), although the baking time will be somewhat longer, which should be checked after the first 45 minutes.
Believe me when I tell you there is no breakfast or snack (or mid-morning bite, or even midnight snack) that doesn't light up with a piece of this fantastic marble cake. Would you eat one right now? It's understandable, and if you do, don't forget to tell us about it!
Best regards,
Rosa


Comments
Moni said:
Querida Claudia. Podríamos meter un molde de bundt dentro de nuestra cocotte para hacer este bizcocho? 🤔
Mari carmen said:
Mi pregunta es la siguiente,tengo una Cocotte de 28 cm,sera demasiado grande el diámetro para hacer un Bizcocho?
Mari carmen said:
Mi pregunta es la siguiente,tengo una Cocotte de 28 cm,sera demasiado grande el diámetro para hacer un Bizcocho?
Idoia said:
He probado esta receta en una cocotte de 22 cm. Es la primera vez que utilizaba la cocotte en el horno, la cocción ha sido de algo más de una hora. El resultado buenísimo, tanto en presencia, sabor y jugosidad. Una receta para repetir.
Claudia said:
Oh sí, sin duda Olga! Los dejas a todos con la boca abierta ;) Y con una sonrisa después de probar este delicioso bizcocho. Saludos!
Olga said:
Madre mía que pinta tan brutal que tiene esta maravilla!!!!!!! y una forma muy original de hacerla y, sobre todo, presentarla…. Me estoy imaginando la cara de mis invitados si sacara la cocotte en el postre… En plan ojos que se les salen de las cuencas “pero todavía hay mas comida?”.
Ahorraré para comprarme una, me encanta.
Besos