
Pay close attention, because today's recipe is not just any cake, but a pure celebration of chocolate pleasure. The lava cake or molten chocolate cakehas echoes of the exquisite chocolate coulant, a superb pastry preparation that, when well made, moves you to tears. Today I bring you the step-by-step to make the lava cake.
The well-baked outer layer with a barely semi-baked core makes the first spoonful release the melting interior onto the plate, similar to how lava flows down a volcano’s slope. Hence its name, lava cake or chocolate volcano cake.
This sponge is a true chocolate indulgence, the perfect excuse to not leave a single scrap on the plate. You’ll see the recipe makes two individual cakes, but if it’s not enough or you want to make more, just multiply the ingredients according to the number of lava cakes you want to make.
Since I suppose you're waiting for the recipe, I won't make you suffer any longer. Time for chocolate!

Ingredients
For two individual lava cakes
- 57 g unsalted butter
- 55 g dark chocolate (minimum 60% cocoa) in drops or small pieces
- 50 g sugar
- 1 large whole egg + 1 large egg yolk
- 1/4 teaspoon vanilla extract
- 1 pinch salt
- 6 g all-purpose flour
- Defatted cocoa powder or powdered sugar (for decorating)
Preparation
- Preheat the oven to 220 °C, and sift the flour.
- Grease two individual molds with butter or non-stick spray. You can use ceramic ramekins or flan molds (you can also use mini cocottes, and you won't even have to unmold them because they look so pretty served at the table).
- In a saucepan, melt the chocolate with the butter in a double boiler and whisk or stir until combined and smooth. Set aside.
- In the KitchenAid mixer bowl, put the sugar with the egg, the yolk, the vanilla extract and the pinch of salt and beat at high speed until it thickens and looks smooth and light in color.
- Add the sifted flour and mix until incorporated.
- Fold this batter with a spatula into the melted chocolate and butter until completely combined.
- Divide the batter into the two molds or flan dishes (about 110–115 grams in each mold).
- Tap the base of the molds on the counter a couple of times to remove air bubbles and settle the batter.
- Place them on a baking sheet and let them rest at room temperature for 15 minutes. Since they are two small molds, the Naturals® trays from Nordic Ware (the small size) are perfect to rest them on.
- Take the tray to the oven with the molds and bake just until you see the top is set and when you gently shake the tray, the cakes wobble slightly.
- Remove them from the oven and, very carefully to avoid burning yourself, run the tip of a knife or a skewer around the edges to separate them from the mold.
- Invert each mold or ramekin onto a plate and let them rest for about 30 seconds before unmolding.
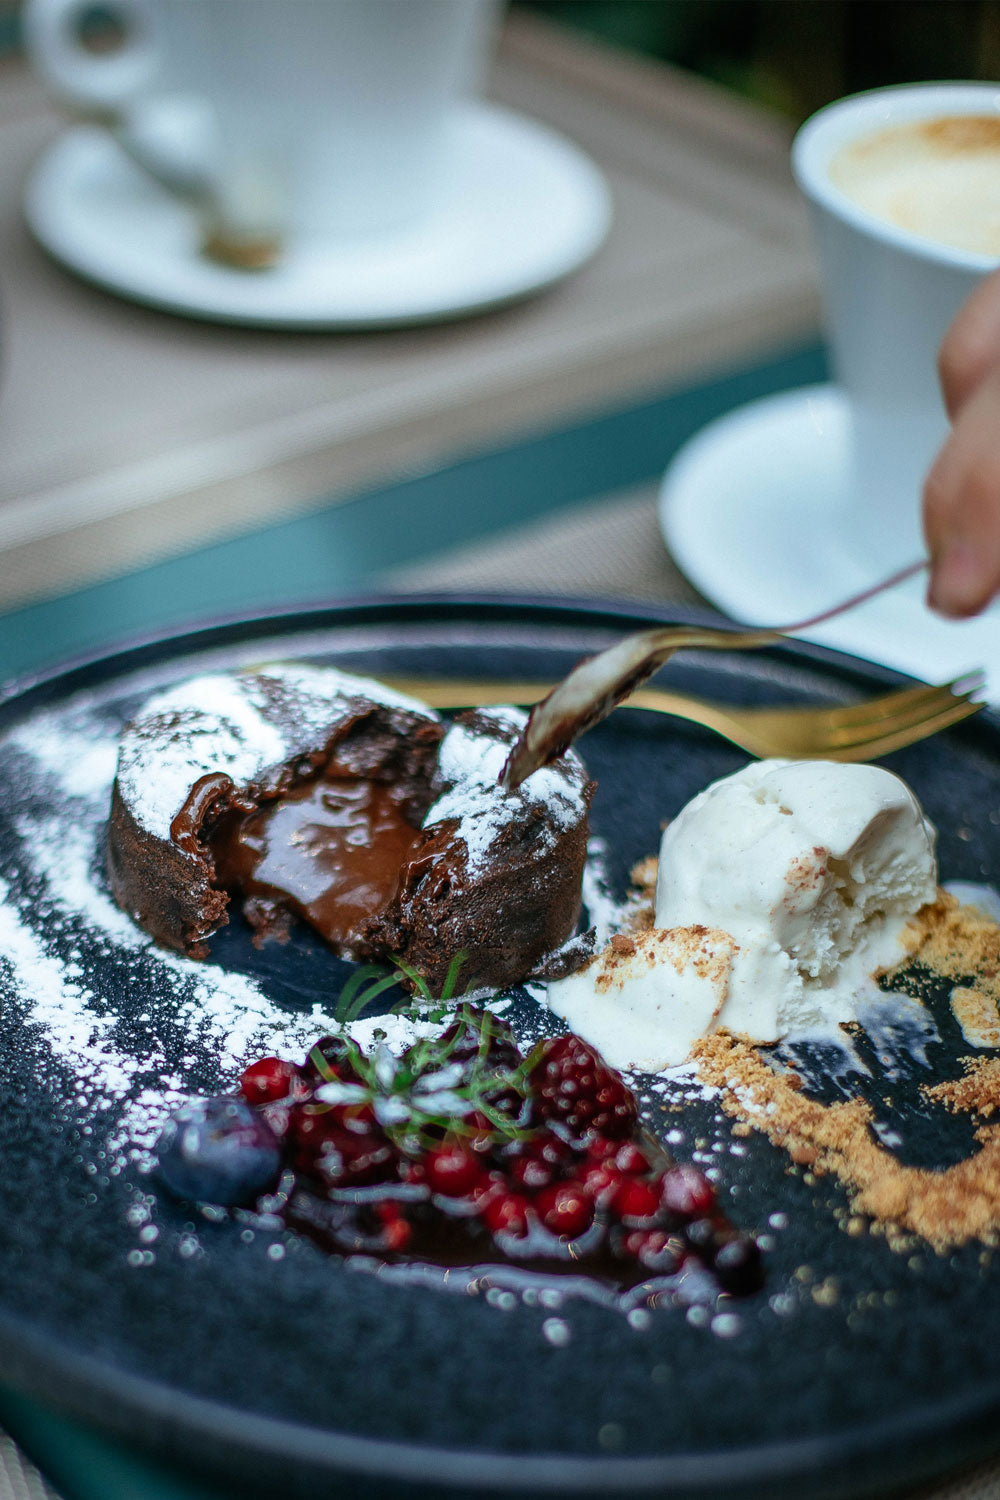
- Dust with defatted cocoa powder or powdered sugar and serve immediately, garnished as you like: with dollops of whipped cream, a scoop of vanilla ice cream and some chopped hazelnuts or walnuts, halved strawberries or a little custard to accompany.
Notes
- This dessert is one where chocolate is the unmistakable star, so use the chocolate you like best, making sure it’s a good quality chocolate.
- To melt the chocolate you can do it in the microwave, always little by little and in intervals of no more than 20–30 seconds at a time. When melted, add the room-temperature butter and stir to incorporate well. You can also use the De Buyer double boiler saucepan, especially if you’re going to make a larger quantity of cakes, since you’ll need to melt a larger amount of chocolate.
- As you can see, you can accompany the lava cake with whatever you like most, to harmonize the flavor or to give it an interesting contrast:
- serve it with a generous spoonful of custard around it,
- with a scoop of vanilla ice cream,
- with a drizzle of pouring cream on top,
- with a little cherry coulis,
- with all the whipped cream you want,
- with some crushed corn nuts on top.
- Whatever you want!
- You can make this cake to your taste using milk chocolate or cinnamon instead of vanilla, or in addition to the vanilla! One exquisite variation is salted caramel. Just add a tablespoon of salted caramel cream to the batter before baking. You can make the caramel yourself or use the Tiptree salted caramel cream, which has a truly delicious flavor.


Comments
Claudia&Julia said:
Hola Ana,
Podrías dejarlo preparado por la mañana, por ejemplo, y hornearlo en el último momento, a la hora del postre. Lo recomendable sería guardarlo refrigerado y sacarlo de la nevera, dejándolo a temperatura ambiente, al menos unos 15 o 20 minutos antes de ponerlo en el horno.
¡Un saludo!
Ana said:
Buenos días.
Me gustaría si se puede dejar preparado y hacerlo en el último momento.
Si es así.¿Se guardaría en la nevera o a temperatura ambiente? Gracias
Claudia&Julia said:
Hola Fran,
Muchas gracias por tu comentario. Nos alegra mucho que probéis las recetas y nos indiquéis el resultado. En este caso, al tratarse de un bocado tan delicioso, nos encanta que te haya gustado tanto ;)
¡Un saludo!
Claudia&Julia said:
Hola Núria,
Tal vez se podrían congelar recién horneados y volver a llevar al horno (bien caliente) durante un par de minutos antes de presentarlos. No lo hemos probado, así que no te podemos decir si resultaría bien o no.
¡Un saludo!
Claudia&Julia said:
Hola Myriam,
Muchas gracias por tu comentario. ¡Nos alegra mucho que te haya gustado tanto! Realmente, es una exquisitez si te apasiona el chocolate tanto como a nosotras ;)
¡Un saludo!
Claudia&Julia said:
Hola Anna,
La cantidad de harina es correcta, son 6 gramos.
¡Un saludo!
Claudia&Julia said:
Hola Xesca,
La cantidad de harina es la que se indica en la receta (6 gramos). Las cantidades de todos los ingredientes son para dos lava cakes individuales, pero si quieres hacer más lava cakes, tan solo has de calcularlas según los individuales que quieras hacer (divide las cantidades por la mitad para saber cuánto corresponde para un lava cake y multiplica por los individuales que quieras hacer).
En cuanto a la cocción, ha de hornearse con calor arriba y abajo y, si quieres, puedes poner ventilador, para que se haga un poco antes, aunque en principio no es necesario.
Y por lo que respecta a la levadura, al no ser un bizcocho, no la requiere.
¡Un saludo!
Claudia&Julia said:
Hola Ramón,
Las cantidades indicadas son correctas, son 6 gramos de harina.
¡Un saludo!
Fran said:
Hola. Desde que lo vi lo quise hacer. He seguido los consejos de Myriam y me han quedado fantásticos, además como tengo las mini cocottes ovaladas de Le Creuset la presentación ha sido todo un éxito.
Muchas gracias por vuestras recetas y consejos.
Núria said:
Hay algún sistema para poderlo tener preparado antes? Para poderlo preparar para una fiesta.
muchas gracias
Myriam said:
Yo hice la receta siguiendo las instrucciones y es el mejor pastel de chocolate que he hecho y probado. Para las dudas que leí aquí: son 6 gramos de harina nada más. Y lo hice con calor arriba, abajo y ventilador.
Eso hizo que estuviera listo (en el horno de casa) en sólo 6 minutos. No hay que separarse del horno, porque en cuanto empieza a crecer y a endurecer la superficie, hay que sacarlos. Queda magnífico.
Anna said:
Tengo dudas en la cantidad de harina… dice 6 gr. Es correcto??? Me parece Muy poco… ya diréis. Muchas gracias!!!
Anna
Xesca said:
Exacto, cuántos gramos de harina, calor estático, ventilador? Receta para dos se pueden multiplicar los ingredientes? No lleva levadura? Uy uy
Xesca said:
Exacto, cuántos gramos de harina, calor estático, ventilador? Receta para dos se pueden multiplicar los ingredientes? No lleva levadura? Uy uy
Ramon de Miguel said:
Una pregunta, en las cantidades, dice 6 gramos de harina, es correcto?, o serían 60 gramos?