
If you're a fan of peanut flavor and Christmas cookies, you'll love this one peanut butter cookie recipe (or, in other words, the popular Peanut Butter Cookies).
It’s a very American recipe, but it’s becoming more and more popular here. I discovered it from Cheryl Day’s Treasury of Southern Baking, and while I’m personally not a big fan of peanut butter and I made the cookies for everyone at home to enjoy, I have to admit that these cookies are delicious.
These are rustic-looking, unpretentious cookies, but the peanut butter along with maple syrup and brown sugar bring out some truly fascinating notes. They smell of trees and wood, and their rustic flavor is honestly delicious with a good cup of coffee in the morning.
They’re perfect cookies for little ones, and also to serve after a good meal while enjoying some after-dinner conversation.
With this recipe you’ll get a good batch of cookies, which you can keep for up to three days in perfect condition (though we all know there’s nothing like a freshly baked cookie)!
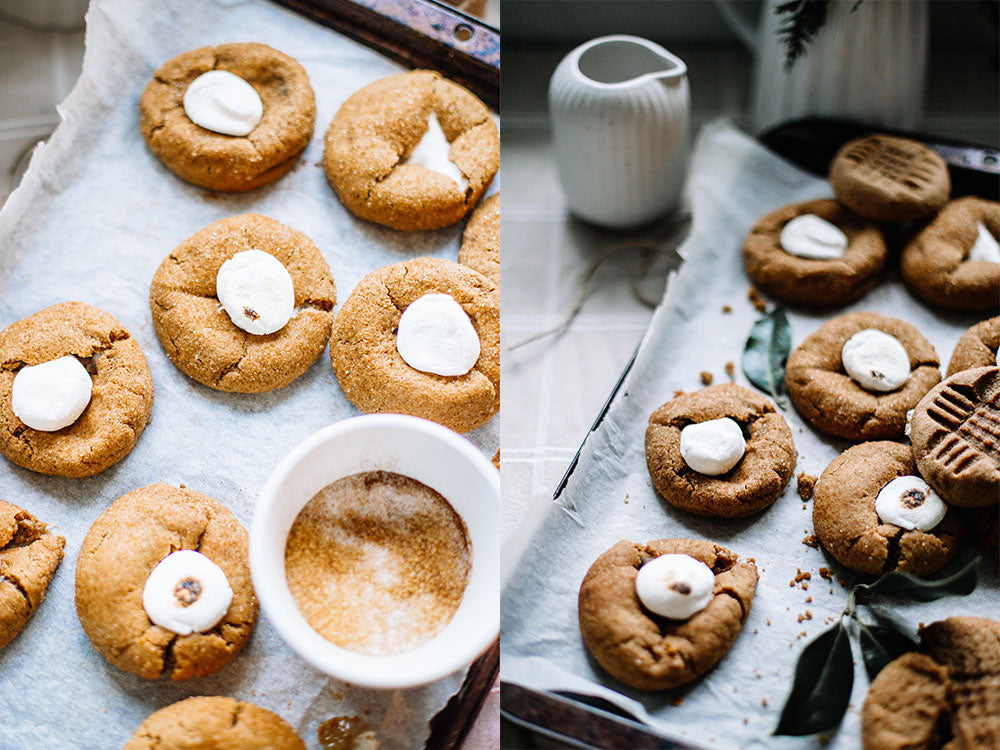
You’ll see below that I suggest making them with flaky salt, but I also encourage you to try them topped with marshmallows. They give the cookies that all-American touch and add a wonderful texture and flavor so you can enjoy them in a different way.

Ingredients (for about 24 cookies)
- 3/4 cup all-purpose wheat flour
- 1/2 tsp baking powder
- 1/2 tsp salt
- 1/4 tsp baking soda
- 8 tbsp (1 stick) unsalted butter, at room temperature
- 1/2 cup brown sugar
- 1/2 cup of white sugar
- 1 tsp maple syrup
- 1 cup of peanut butter*
- 1 large egg
- 1 tsp pure Madagascar vanilla extract
- 1 cup of honey-roasted peanuts
- Salt flakes, for sprinkling
*You can use homemade peanut butter (they're the same thing). Making it is very easy, you can see how in this post.
Preparation
- In a bowl, sift the flour, yeast, salt, and baking soda. Set aside.
- In the bowl of your KitchenAid if you make it in a mixer or in a large bowl if you're using a hand mixer, beat the butter, the two sugars, and the maple syrup at medium speed until super smooth and fluffy (3 to 5 minutes; the sugar should be fully incorporated and no granules should be noticeable).
- Add the peanut butter, egg, and vanilla, and mix until fully incorporated. Reduce to low speed and gradually add half of the flour mixture, mixing until combined. Add the remaining half of the flour and mix until combined as well. Add the peanuts.
- Remove the bowl from the mixer and, using a spatula, finish mixing, making sure there are no remnants at the bottom of the bowl and that everything is well incorporated. Your dough is ready.
- Cover with plastic wrap and let rest in the fridge for about 30 minutes.
- Preheat the oven to 170 ºC.
- Place parchment paper on two baking trays and use a tablespoon to form the cookies (approximately 1 heaping tablespoon for each cookie).
- Start shaping the cookies, round, on the trays. Place them a couple of finger-widths apart from each other so they have room to spread. When you’ve divided all the dough, use a fork to lightly press the surface of each one so the fork’s tines are marked. Do it twice, once vertically and once horizontally, to draw the classic old-school crosshatch pattern.
- As a finishing touch, sprinkle a pinch of flaky sea salt over each cookie.
- Place the trays in the oven and bake for 10 or 12 minutes, until golden. Switch the trays between racks so they brown evenly. When baking is finished, let them cool on a wire rack so they turn out crisp.
TIP! If you like, instead of flaky salt you can put cut or sliced marshmallows on top of the cookies (add them before baking). The taste of toasted, sweet, pillowy marshmallows contrasts with the peanut flavor of the cookie and they taste delicious. If you make them this way, I also suggest sprinkling a pinch of brown sugar over the marshmallow for a shinier, prettier finish to the cookie.
With marshmallows, it’s a way to switch up the recipe and bring out smiles! You can also bake both—some with salt and others with marshmallows—and find out which ones are liked most at home.
Notes
- If you want, you don’t have to bake all the cookies on the same day: you can freeze part of the dough or, even more practical, when you have the cookies shaped on the baking sheet, you can freeze them as they are, already formed (if you have a large freezer, put the sheet in it; if not, transfer the shaped cookies to a smaller container or a zip-top bag). That way, on the day you want to enjoy them you only need to turn on the oven and bake them for a few minutes. It’s convenient, and you can enjoy freshly baked cookies more often! You can keep the dough frozen for up to 2–3 months.
- For baking cookies, nothing beats a good perforated baking sheet or a cookie sheet. Discover all the ones we have in the cookie sheets section and use it not only for that, but also for baking pizzas, making puff pastry tarts, shortcrust pastry, breads... A baking tray is a kitchen essential!
- Once baked, the cookies can be stored in an airtight container, at room temperature and in a dry place, for up to 3 days. We have some cookie jars that are perfect for this in the section Stands and Freezers.
- These days you’ll find peanut butter in any large supermarket. Check the chocolate and hazelnut spreads section or ask for it.


Comments
ROSA MARIA said:
Hola, una pregunta, cual es el peso de las medidas que decis en tazas, por favor?
Tengo ganas de hornear estas galletas 😉
Muchas gracias
maria jesus said:
Hola,recientemente me he comprado una batidora manual de varillas kitchenaid y no encuentro manual para saber que velocidades hay que utilizar en cada receta, no se si existe algún sitio para poder verlo, me gustaría recibir información. Muchas gracias.