
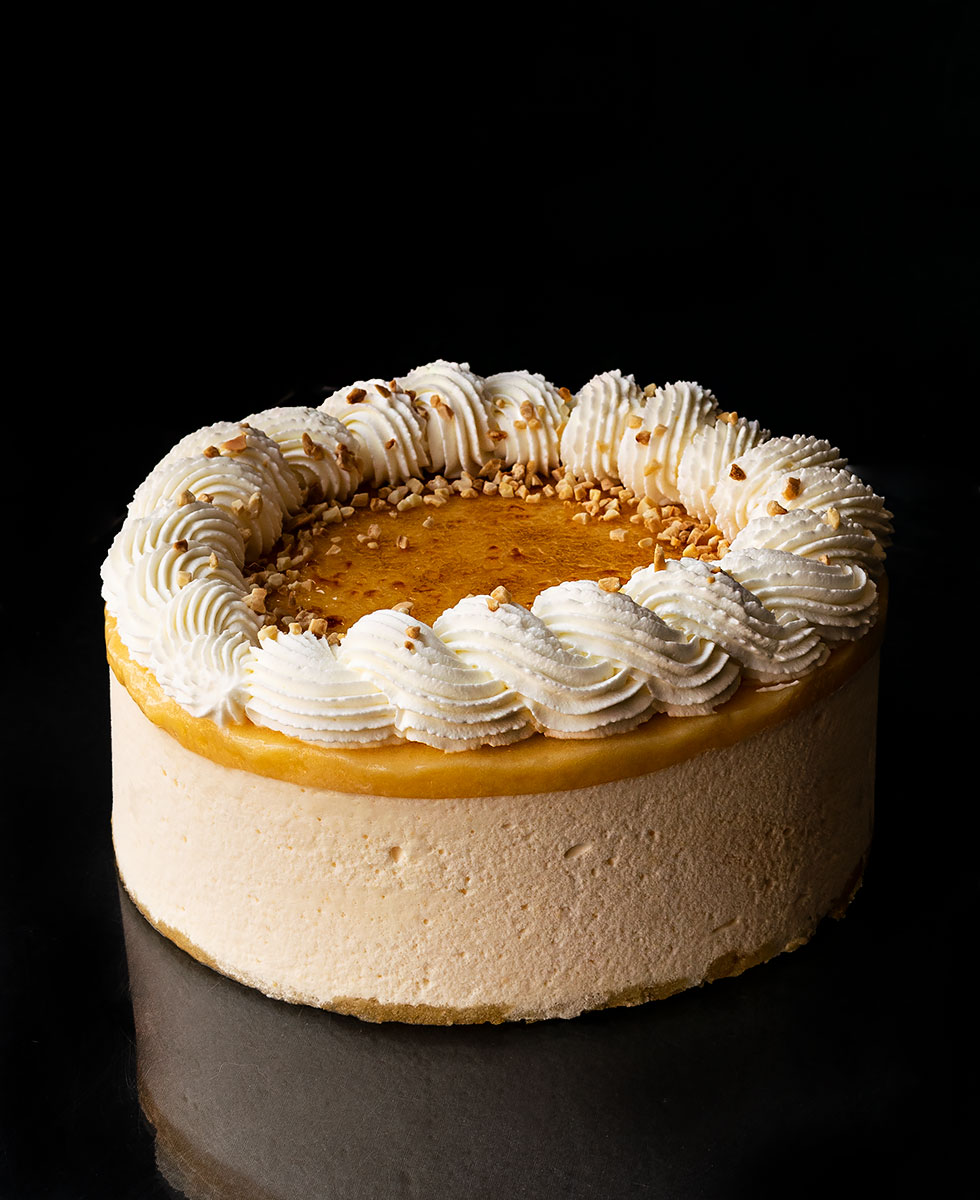
Forgive me, I know there are countless wonderful frozen desserts today to beat the heat. A huge range of flavors, textures, colors... But I'm a romantic and, despite enjoying all things new and novel, I can't live without the traditional sweets. That's why this summer we can't stop making this Whisky Ice Cream Cake and dusting off fond childhood memories.
I say childhood because this dessert had its heyday in the 80s or perhaps even a little earlier. This ice cream cake was that "super trendy" dessert that many places had when you went out to eat with your parents. In fact, my father always ordered it. And if it wasn't available (which was rare), he ordered flan with cream and walnuts... Here I should add that he was the one who got me hooked on walnuts with cream. What a vice, right?
As I mentioned earlier, I think it's good to have a wide repertoire of recipes at home. Nothing pleases me more than discovering and trying new preparations, but never forgetting the traditional or "old-fashioned" ones. These are the foundation of everything we enjoy today. As I've said more than once, it's the classical ballet of cooking. From it all other styles are created and arise.
This cake is very simple and doesn't involve complex preparations. The only thing we must do to achieve good results is to respect the times and processes of each step.
Assembling the cake
To assemble the cake I used a 20 cm Push-Pan mold. It's very convenient to work with, but especially when unmolding it. To make it we will need a sponge cake, the whisky cream filling and a layer of custard.
The base is a sponge genoise that we will make ourselves. It's very easy to make at home and the baking time will be around 8-10 minutes. Very little time, it's truly worth it. But I know many of you will think -Can I use a store-bought sponge?-. I'm not a big fan of that (at all), but I would forgive you for that because of this heat ;)
The filling, despite what it may seem, does not need to be made with an ice cream maker. We'll prepare a whisky cream that we will cook for a while, since it contains egg, then combine it with meringue, whipped cream and gelatin. That said, here we must wait a few hours for the filling to firm up in the freezer. For the filling cream I followed the recipe from the blog atrapadaenmicocina.com
The top layer is a layer of custard that we will brown to give it that characteristic caramelized finish. Finally we'll decorate with whipped cream and it will be ready to enjoy. Don't tell me you're still thinking about it... Let's go and get to work! ;)

Whisky ice cream cake prepared in a tall PushPan mold
Ingredients
(For a 20 cm PushPan mold)
For the sponge genoise:
- 4 large eggs
- 100 g of low-protein pastry flour
- 100 g of sugar
- 20 g of cornstarch
- Pinch of salt
For the Whisky syrup:
- 85 g of water
- 85 g of sugar
- Whisky to taste
For the filling:
- 4 large eggs
- 80 g of whole milk
- 100 g of sugar (divided into 20 g + 80 g)
- 50 g of powdered sugar
- 6 sheets of gelatin (11 g)
- 50 g of Whisky
- 350 g of heavy cream, high fat content
For the custard:
- 6 large eggs (338 g, shelled weight)
- Same weight of sugar as eggs, in my case 338 g
- 180 g of room temperature water
- 30 g of cornstarch
For the whipped cream to decorate:
- 200 g of very cold whipping cream
- 2 tablespoons of powdered sugar
- Almond croquant for decorating
Method
First day
Prepare the sponge genoise
- Sift the flour and mix with the cornstarch and salt. Set aside.
- Separate the yolks from the whites. Put the yolks in a heatproof bowl with half of the sugar.
- Place the bowl over a pan with a little water for a bain-marie making sure it does not reach boiling at medium-low heat.
- Beat with electric beaters until pale. You will see it takes on a whitish color.
- Remove from heat and set aside.
- Beat the whites with the other half of the sugar until you obtain a firm, glossy meringue.
- Fold the pale yolks into the meringue and mix with gentle, enveloping motions.
- Start adding the flour little by little and incorporate it into the mixture with folding motions. You should never whisk or stir the mixture, otherwise the meringue will deflate.
- Pass the mixture into a piping bag.
Bake
- Preheat the oven to 200ºC with top and bottom heat.
- Line a perforated baking tray with parchment paper. To prevent the paper corners from lifting or moving when piping the batter, place small “globs” of batter in the corners. This will keep the paper fixed.
- Cut the tip of the piping bag and pipe the batter. Make a rectangle and then fill the interior maintaining the same pressure at all times.
- If you have more batter in the piping bag, create lines around the rectangle.
- Put in the oven for 8-10 minutes. You will see a slight golden color on the surface. Also if you press the surface of the sponge, it will return to its original state.
- Remove from the oven and let cool completely on a rack.
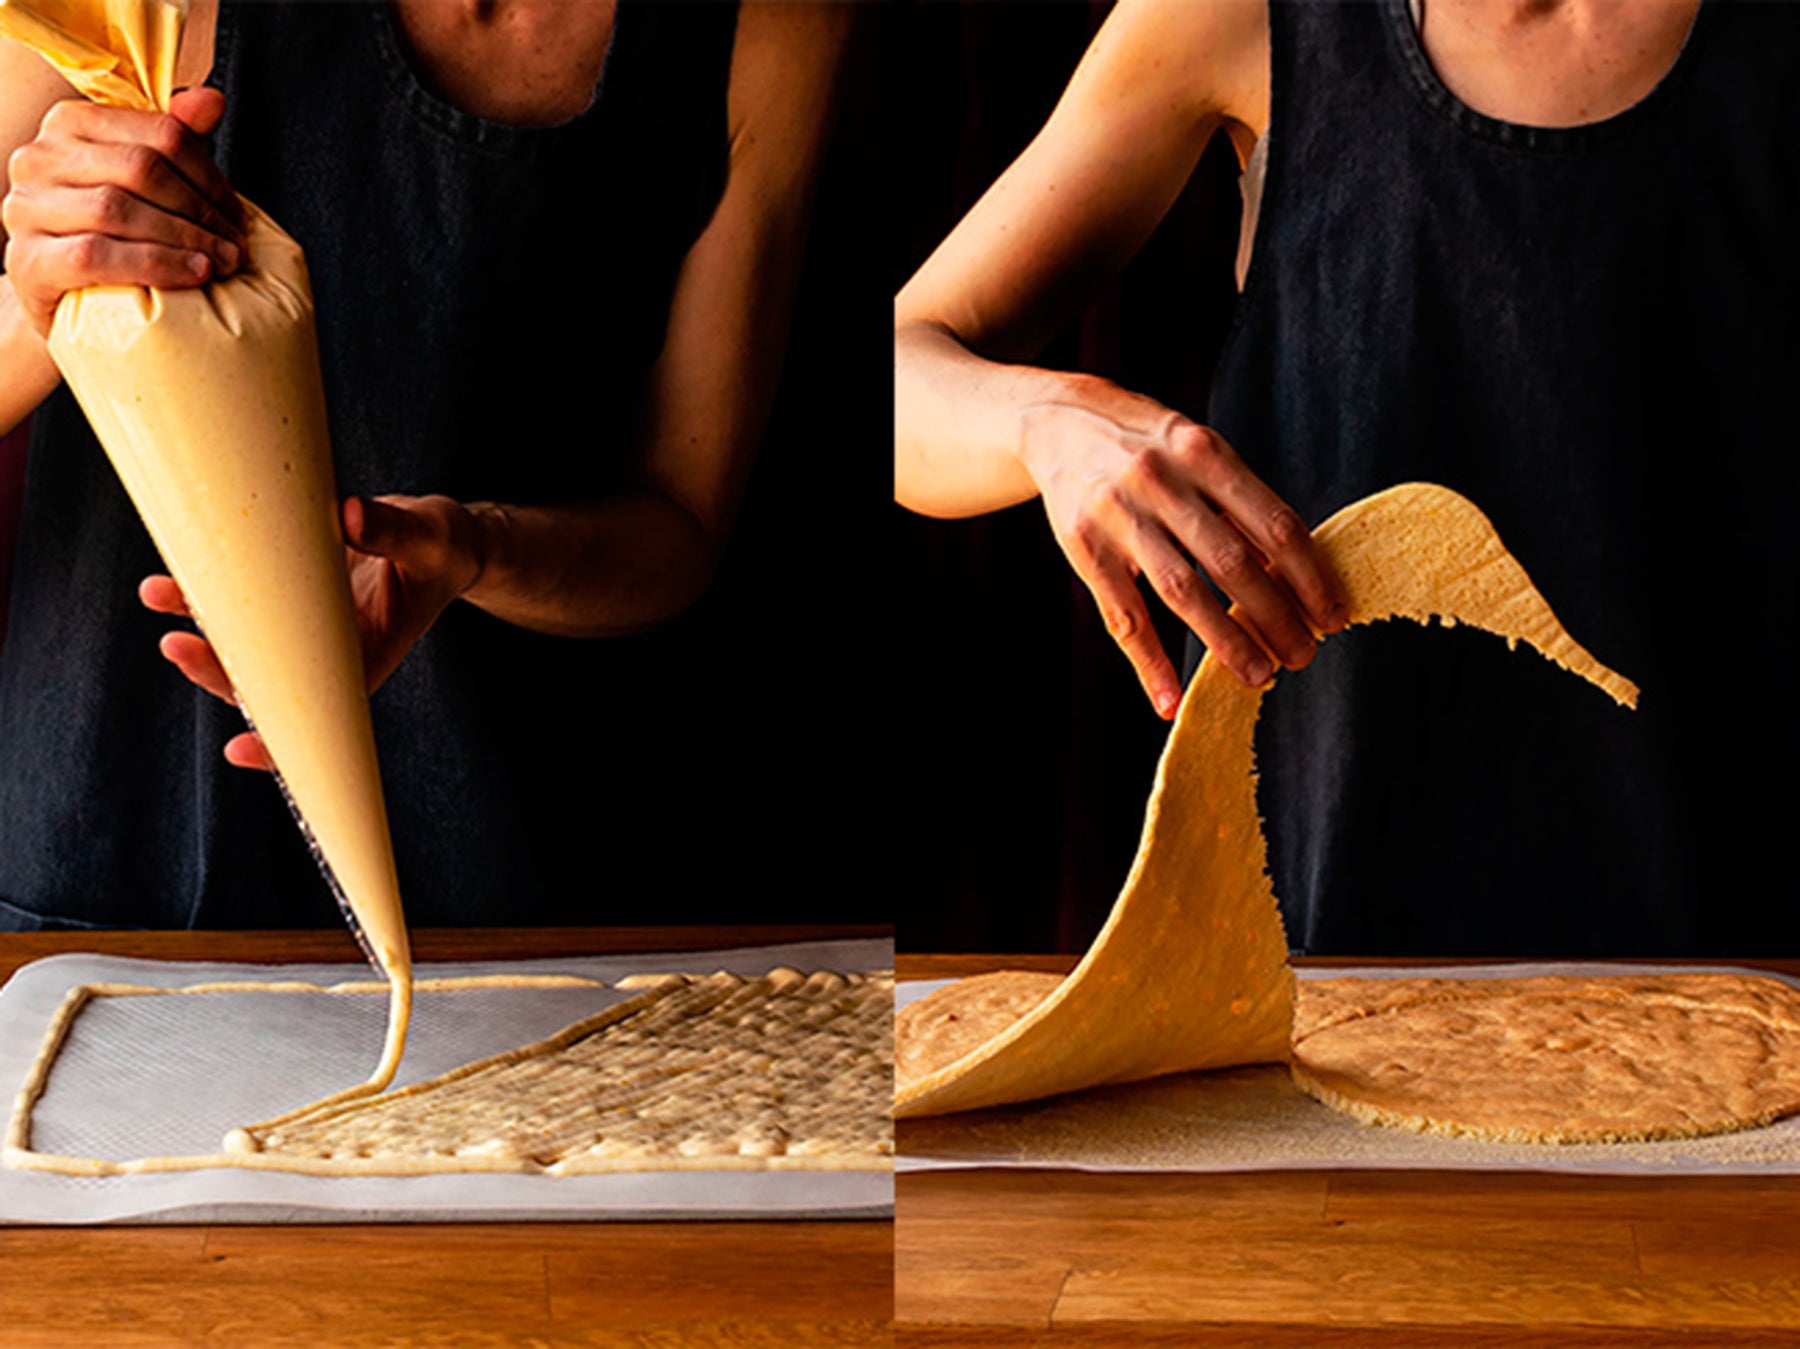
De Buyer piping bag and De Buyer perforated baking tray
Prepare the syrup
- Add all the ingredients to a pan except the liquor. Place over medium heat and bring to a boil. The sugar should have completely dissolved.
- Once it starts boiling, turn off the heat and let it cool completely.
- Pour the syrup into a squeeze bottle using a funnel, add the liquor, close and shake to mix well. You can also pour the syrup into a bowl, add the whisky and mix. To soak the sponge, in this case, we'll use a pastry brush.
- Set aside at room temperature.
Prepare the cream for the cake filling
Before whipping the cream we must ensure two things:
- The cream should be chilled for at least 24 hours in the cold.
- The bowl where we whip the cream must be cold. I recommend using an aluminum bowl and placing it in the freezer 20 minutes before whipping the cream.
- Pour the cream into the cold bowl and start whipping with electric beaters at speed 1.
- Once it starts to thicken, add the powdered sugar little by little while continuing to beat. Increase the speed gradually but never to the maximum. Ideally a medium speed.
- Beat until you get cream that forms soft, firm peaks, not over-whipped. Be careful not to overbeat or you'll make butter…
- Cover the bowl with plastic wrap and refrigerate until ready to use.

KitchenAid stand mixer and Nynet Mediterránea glass bowl
Prepare the whisky ice cream filling
- Add very cold water to a bowl and submerge the gelatin sheets. Let hydrate for 15-20 minutes.
- Separate the yolks from the whites.
- Add the yolks to a small saucepan with 20 g of sugar and the milk. Place over medium heat and stir constantly with a whisk.
- Do this until the mixture reaches 75º-77ºC, for which you'll need a digital thermometer.
- Remove from heat, continue stirring for 1 minute and let the temperature drop to 50º-55ºC.
- Add the drained gelatin along with the whisky and mix with a whisk until you achieve a homogeneous mixture. Set aside.
- Whip the egg whites with the 80 g of sugar.
-
In the KitchenAid bowl or using electric beaters, whip the egg whites.
- Start at a lower speed and gradually increase.
- Once the whites are semi-whipped, add half the sugar and continue whipping.
- You will see the whites become firmer, add the rest of the sugar and continue whipping until you obtain a meringue that forms soft peaks and is glossy. But not dry, careful, do not overwhip the whites.
Combine all elements for the filling
- In a large bowl add the whisky cream with the meringue.
- Incorporate both elements with a silicone spatula using gentle folding motions. This helps prevent the meringue from deflating.
- Add the whipped cream little by little. Do this the same way as with the meringue, gentle folding motions until fully homogeneous.
- Set aside.
Cut the genoise sponge
- Separate the sponge from the parchment carefully so as not to tear it. Turn it over so the toasted side is down.
- Using a 20 cm diameter plate, cut a circle of sponge. You can eat the rest (it's very good) or cover it with plastic wrap and refrigerate or freeze for other preparations.
Assemble the whisky ice cream cake
- Place a non-slip disc on the base of the 20 cm Push-Pan mold to secure the cake board.
- Place the disc and a small amount of filling on it; this will help fix the sponge.
- Wrap the inside of the mold with an acetate sheet. This will help unmold the cake more cleanly.
- Place the genoise sponge and press lightly.
- Generously soak with the syrup.
- Pour the filling mixture into the mold. Smooth the surface trying to make it as even as possible.
- Cover with plastic wrap and put in the freezer until the next day. A minimum of 12 hours.
Second day
Prepare the custard
- In a bowl mix the sugar with the cornstarch. Set aside.
- In a medium bowl, add the eggs with the water and whisk well.
- Pour into a medium pot through a sieve to remove any chalaza from the eggs.
- Add the sugar and cornstarch mixture, place over low heat (on a 1-6 scale I used 2), and cook without stopping stirring with the whisk until the mixture thickens. It will take between 7-10 minutes.
- Once it begins to thicken, it will do so very quickly. As a guide, the mixture will be ready in density when it reaches between 93º-96ºC.
- Remove from heat and pour the cream into a wide container. The larger it is, the faster it will cool.
- Cover with plastic wrap touching the surface and let cool completely at room temperature.
Cover the cake with the custard
- Pour the custard over the ice cream cake as soon as you take it out of the freezer.
- Tap the mold gently against the work surface (with a cloth underneath) to settle the custard.
- Cover again with plastic wrap and put in the freezer for a minimum of 3 hours.

Pastry brush T&G and Tall non-stick removable Push-Pan mold
Decorate the cake
- Take the cake out of the freezer, unmold, remove the acetate and put it back into the mold. To do this place the cake on a wide container/glass, lower the mold, remove the acetate and raise the mold back up.
- Sprinkle sugar over the surface.
- Caramelize with the help of a kitchen torch until caramelized.
- Decorate the edges with whipped cream (whip the cream the same way as before), sprinkle with almond croquant and return to the freezer until serving.
- Ideally temper the cake 15 minutes before serving. If it's very hot, it may need less time.

20 cm Tall Non-stick Removable PushPan Mold and Kitchen Craft kitchen torch
Notes
- If you make the sponge batter properly, that is, do not overbeat the mixture, we will obtain 2 griddles of Genoise sponge cake. In my case I like to make this amount because that way I can freeze the other griddle to make another cake.
- I recommend soaking the sponge well so that when you eat it, it has a very moist texture.
- Gelatin sheets can be substituted with powdered gelatin. The ingredient list specifies the amount in grams you should use in that case.
- Respect all temperatures specified in the method, as well as the steps, to obtain a good result.
- If you don't have acetate you can use parchment paper instead. The advantage of acetate is that it helps unmold cakes very well and is very clean to work with.
- The cake can be kept frozen for 30 days, but you must not break the cold chain. That is, portions you temper should be consumed and not refrozen.
This Whisky Ice Cream Cake can be one of your ideal desserts this summer. It has many good qualities, among them how incredibly delicious it is. But one thing worth highlighting is that you can make it in advance, even 2-3 days ahead, and keep it frozen until you're ready to serve.
That said, I recommend leaving it inside the Push-Pan mold and well covered with plastic wrap to prevent it from drying out and/or picking up freezer odors.
I hope you give it a try and tell us soon what you thought!


Comments
bernabé said:
Si por casualidad tienes la suerte de añadirle
whisky japonés , ganará una locura
Aquí lo puedes encontrar.
https://whiskyjapones.com/"
Saludos