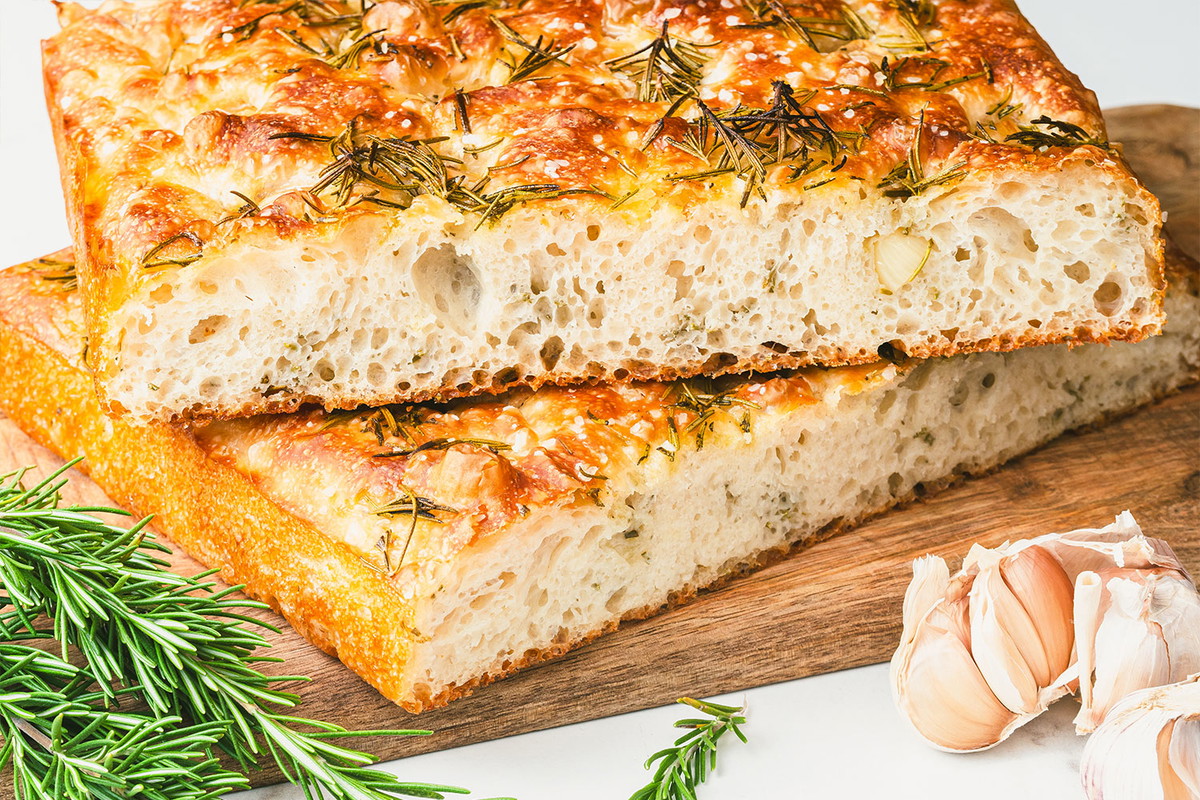
There is something magical about making homemade focaccia: that moment when the dough begins to transform, the aromas of garlic and parmesan fill the kitchen and you know you're creating something special. This recipe has it all: a crispy, golden crust that smells divine, a soft, pillowy interior that soaks up the best olive oil, and the distinctive touch of parmesan that elevates every bite. With the help of the KitchenAid stand mixer, making this wonder will be easy and hassle-free.

The best thing about this focaccia is its versatility. Want something quick but special for dinner? Serve a still-warm piece with a fresh salad or your favorite cheese. Hosting guests? Cut it into small squares or strips and you'll have the perfect appetizer: simple, delicious, and ready to share. And if you're looking for a bread with character to accompany your main dishes, you won't find a better option. From stews to charcuterie boards, this focaccia elevates any meal.


Besides being delicious, making focaccia is an experience in itself. From the moment you prepare the dough, until it comes out of the oven with that blend of garlic, parmesan and olive oil aromas that fills your kitchen, it's a reminder of how comforting cooking at home can be. A recipe as easy as it is irresistible, that will make you feel like you're in an authentic trattoria Italian.

Ready to get your hands on the dough? I assure you this focaccia will be a hit on any occasion, and it might even disappear before it cools down!

Note: You'll see I propose two different finishes, with crushed garlic, or with visible sliced garlic. In both ways the garlic touch will make this focaccia extra special!


Version of the focaccia with the crushed garlic mixed with the oil and parmesan (in the process below, finish option 1)


Ingredients

  • 500 ml lukewarm water (tending toward warm, but never very hot or cold)
  • 2 tsp instant dry yeast (or 20 g fresh yeast)
  • 1 tbsp sugar
  • 3 tbsp olive oil
  • 550 g all-purpose flour
  • 1 tbsp salt
  • 2 cloves garlic, grated
  • 2 generous tbsp grated parmesan cheese
  • Sea salt flakes like Maldon
  • Rosemary (optional)

Preparation

  1. In a glass, mix two fingers of water with the yeast until dissolved. Leave for a couple of minutes to start activating.
  2. In the bowl of the KitchenAid mixer, add the lukewarm water, the yeast dissolved in water, the tablespoon of sugar, 1 tablespoon of olive oil and the flour in the bowl of the stand mixer fitted with the dough hook. Mix everything at speed 2 until a wet, sticky dough forms.
  3. When everything is integrated, add the salt, and continue kneading.
  4. Once everything is incorporated, you should alternate kneading for 2 minutes at higher power (speed 4-6), with rests of 10 minutes, until you have a smoother, less sticky dough (despite this, in this case we do not aim to achieve a dough as smooth as a well-worked bread, we only intend to develop some gluten and for it to stop being so sticky*).
  5. After several kneadings, cover the bowl with a cloth and let rest for 15 minutes in a warm place.
  6. Moisten your hands and do 4 folds, turning the bowl 90° between each fold. Cover the bowl with a cloth and let the dough rest for about 10 minutes. Repeat this step 3 more times.
  7. Leave the dough in a greased bowl and brush the dough with oil. Cover the bowl with cling film and let rest at least 1 hour and a half, until it doubles in size and air bubbles form on the surface.
  8. Brush a baking pan with oil (in this case we will use a Naturals Nordic Ware pan). Add the dough, gently stretching it toward the corners and edges of the pan. Let it rest another 30 minutes.
  9. Preheat the oven to 220 ºC.
  10. Use your fingers to create dimples in the dough, the typical focaccia ones, spread across the entire surface.

*In the video you will see a fairly sticky dough, but personally I prefer to work it more usually and develop the gluten more. It becomes more manageable and results in a denser, airier crumb. That said, the video version is a quick version, focused more on playing with folds and rests, ideal if you don't want to invest much time in kneading.

Finish:

1) For a focaccia with crushed garlic: In a separate bowl, mix the remaining olive oil, the garlic and the parmesan. Pour that oil over the top of the dough. If you want to include rosemary, add it over the surface as well.
2) For a focaccia with sliced garlic on top: Thinly slice the garlic and scatter the slices across the entire surface of the focaccia. In a bowl, mix the oil and the parmesan, and pour it over the top of the dough as well. If you want to include rosemary, add it over the surface as well.

Baking:

  1. Bake for 30 minutes at 210 ºC*. Remove the focaccia from the oven and let it rest on a rack until most of the intense heat has dissipated.
  2. Sprinkle sea salt flakes (like Maldon) over the surface.
  3. Serve it still hot or warm. You'll see how delicious it is!

Version of the focaccia with sliced garlic and rosemary (finish option 2):

Comments

Victoria said:

Me uno al comentario de Laura, la masa sale demasiado liquida. Po favor ¿podríais revisar la proporción de harina y su fuerza?
Gracias

Laura said:

Creo que debe haber un error de proporción en las cantidades de agua y harina.
He probado a hacerla y la masa inicial era tan líquida que prácticamente la kitchenaid no podía amasarla.
Soy bastante experimentada en pizzas, cuya proporción de agua con respecto a la harina es menor, pero nunca había hecho focaccia y pensé que esto podría ser una de las diferencias al hacer la masa.
Al final he agregado unos 50 gr. más de harina, aunque sigue quedando demasiado blanda.
Por otro lado me gustaría saber porque se utiliza una harina normal en vez de una de fuerza.

Leave a comment

Garlic, Parmesan, and Rosemary Focaccia

Claudia&Julia

Comensales

8

Tiempo de preparación

15 minutes

Tiempo de cocinado

30 minutes

Cuisine

Italian

Categoria

Baking

There is something magical about making homemade focaccia: that moment when the dough starts to transform, the aromas of garlic and Parmesan fill the kitchen, and you know you are creating something special. This recipe has it all: a crisp, golden crust that smells heavenly, a soft, fluffy interior that soaks up the finest olive oil, and the unmistakable touch of Parmesan that elevates every bite. With the help of the KitchenAid stand mixer, making this marvel will be easy and hassle-free.


The best thing about this focaccia is its versatility. Want something quick yet special for dinner? Serve a piece while still warm with a fresh salad or your favorite cheese. Having guests over? Cut it into small squares or strips and you will have the perfect appetizer: simple, delicious, and ready to share. And if you are looking for a bread with character to accompany your main dishes, you will not find a better option. From stews to charcuterie boards, this focaccia enhances any meal.

Besides being delicious, making focaccia is an experience in itself. From the moment you prepare the dough until it comes out of the oven with that blend of garlic, Parmesan, and olive oil aromasthat fills your kitchen, it is a reminder of how comforting home cooking can be. A recipe that is as easy as it is irresistible, and that will make you feel like you are in an authentic Italian trattoria.


Ready to get baking? I can assure you this focaccia will be a hit on any occasion, and it may even disappear before it cools down!

Garlic, Parmesan, and Rosemary Focaccia

Ingredientes

  • 500 ml lukewarm water (leaning toward warm, but never very hot or cold)
  • 2 tsp instant dry yeast (or 20 g fresh yeast) 
  • 1 tbsp sugar
  • 3 tbsp olive oil
  • 550 g all-purpose flour
  • 1 tbsp salt
  • 2 grated garlic cloves
  • 2 generous tbsp grated Parmesan cheese
  • Flaky salt like Maldon
  • Rosemary (optional)

Preparación

  1. In a glass, mix about two fingers of water with the yeast until dissolved. Leave it for a couple of minutes so it starts to activate.
  2. In the KitchenAid bowl, add the lukewarm water, the yeast dissolved in water, the tablespoon of sugar, 1 tablespoon of olive oil, and the flour into the stand mixer bowl with the dough hook attached. Mix everything on speed 2 until a wet, sticky dough forms.
  3. Once everything is combined, add the salt and continue kneading.
  4. Once everything is incorporated, you should alternate 2-minute kneading intervals at a higher power (speed 4-6) with 10-minute rests until you have a smoother, less sticky dough (even so, in this case we are not aiming for a smooth dough like that of a well-worked bread; we simply want to develop the gluten somewhat and make it less sticky, which you will see clearly in the video).
  5. After several rounds of kneading, cover the bowl with a cloth and let it rest for 15 minutes in a warm place.
  6. Moisten your hands and make 4 folds, turning the bowl 90 ° between each fold. Cover the bowl with a cloth and let the dough rest for about 10 minutes. Repeat this step 3 more times.
  7. Place the dough in a greased bowl and brush the dough with oil. Cover the bowl with clear  plastic wrap and let it rest for at least 1 and a half hours, until it doubles in size and air bubbles form on the surface.
  8. Brush a baking pan with oil (in this case we will use a Naturals Nordic Ware pan). Add the dough, gently stretching it toward the corners and edges of the pan. Let it rest for another 30 minutes.
  9. Preheat the oven to 220 ºC.
  10. Use your fingers to create dimples in the dough, the typical focaccia ones, spread across the entire surface.

blank

  1. 1) For focaccia with crushed garlic: In a separate bowl, mix the remaining olive oil, the garlic, and the Parmesan. Pour  that oil over the top of the dough. If you want to include rosemary, add it over the surface as well.

  2. 2) For focaccia with sliced garlic on top: Slice the garlic into thin slivers and scatter them over the entire surface of the focaccia. In a bowl, mix the oil and Parmesan, and pour it over the top of the dough as well. If you want to include rosemary, add it over the surface too.

blank

  1. Bake for 30 minutes at 210 ºC*. Remove the focaccia from the oven and let it rest on a wire rack until it loses the most intense heat.
  2. Sprinkle flaky salt (such as Maldon salt) over the surface.
  3. Serve while still hot or warm. You will see how delicious it is!