
How to write or decorate cookies and cakes clearly
Whether it is to decorate some cookies or write a nice message on a cake, sometimes we wonder if we will be able to write, decorate or draw clearly on our homemade pastries and have a dignified line and a beautiful finish.
The truth is that writing a message on a cake or sweet that we have prepared at home is a great way to personalize it, give it the final romantic touch or make you smile with a special or nice word. But when one imagines that personalized sweet , expectations are high -we imagine perfect letters, a perfect decoration or a divinely written message; and we want to do it right.
Keep in mind that regardless of the end result, if it's made with love, the person receiving it will love it . So... get rid of nerves and pressure! The only pressure is the one you put on yourself. From here, as we certainly want it to be as good as possible, I hope you succeed and leave it as you imagine with these tips for writing on cakes and cookies in a clear and elegant way .

Choose the coverage with which the message will be made
You can write the message with various ingredients. The most common and what you should take into account when choosing is:
- With glaze: It must be at room temperature to flow correctly. In case you take it out of the fridge, beat it with the KitchenAid (with the spatula accessory) so that it warms up a bit. If you have never prepared it, it may be convenient for you to read this post , in which we tell you how to make frosting.
- Royal Icing: This is a mixture of whipped egg whites with sugar, and it may solidify relatively quickly. Some skill is required to handle it, but it can be done (if it hardens, stir it well in a bowl).
- Melted chocolate: a classic that never fails, but sometimes it's hard to find the right point of heat to write correctly: if it's too hot, it releases very quickly from the sleeve and very thick pieces remain, or the chocolate will flow once applied, making that there is no clear message; and if it's too cold, it's hard to get out and write. You must find the correct temperature point, according to your speed to write. *You can melt the chocolate in the microwave, you will save time and it has its advantages.
Why melt chocolate in the microwave
The truth is that it is really practical to melt chocolate in the microwave, and although there are many recipes and preparations that we insist on making using traditional methods, I must admit that, when we talk about melting chocolate, using the microwave has great advantages, such as :
- You save time : it melts quickly, and you save time just thinking about having to boil water in a bain-marie if you want to do it with that method. By melting the chocolate in the microwave, you will save more than half the time compared to melting it on the stove.
- It is more efficient , because the microwave heats all the chocolate at the same time, evenly , while in a saucepan on the fire the heat is concentrated at the base.
When it comes to achieving brilliant, perfectly melted chocolate for frosting, decorating cakes and cookies, you can melt it in the microwave with amazing results in record time.
Choosing the right utensil for writing on cakes and pastries
Today you have at hand different tools that are the most efficient for decorating and drawing on cookies and cakes. The most common are the sleeve and the pressure gun:
1. Piping bag:
A classic that never fails. You can use disposable sleeves , or reusable (nylon or cotton). One of the most sold in the store is the Kaiser sleeve , which incorporates several basic tips with a very good quality/price ratio, and the classic De Buyer. The interesting thing is to have a narrow tip, which you can always buy separately (the De Buyer mouthpiece set includes a narrow tip that is great for writing).
Things to keep in mind when writing with a piping bag:
- To write, do not fill the bag more than half its capacity, you will have more control.
- Choose well the tip you use : if it is a cake with a large area, you can choose a wide tip, but if you have a small area or write on cookies, choose a narrow tip.
- In case of using the disposable sleeves without a mouthpiece, it is important to make a very small cut at the end of the bag, to ensure a fine line (and remember that you will always have time to make it a little larger).
2. Gun with tank:
The De Buyer pressure gun has become an indispensable accessory for many pastry chefs. It is comfortable to use , has a large dough capacity and is much more practical to clean. Apart from its multiple uses, it has different nozzles, some narrow, perfect to use for writing. In addition, the trigger allows you to exercise very precise control when it comes to stopping writing. To write, you can either choose the PRO model , which includes narrow nozzles and several tanks, or choose the standard model and buy the nozzles for the gun that you require separately.
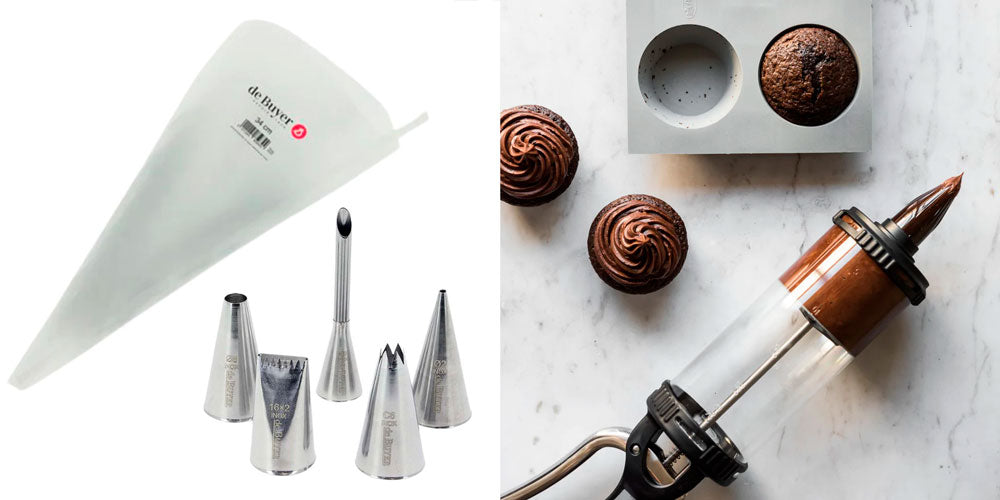
De Buyer piping bag and nozzle set , and De Buyer pressure gun
Tips for writing on cakes and cookies
Now yes: you are equipped, you have the star ingredient to write your message, and only the essentials are missing... Launch yourself to do it! For you to successfully and neatly write your message on biscuits and biscuits, keep these tips in mind:
- Make sure the cake or cookie has cooled: if it's still hot, the frosting will melt, not set and defined. So let your pastry cool completely on a cooling rack with no heat inside before you get down to writing.
- Sit on a high and wide surface: where you feel comfortable, there is space to place the cookies or cake and you can comfortably open and place your arms and the table is at the correct height to write correctly.
- Uppercase or lowercase? You have to decide, which is not so easy: the capital letters seem easier to do, they are simpler and clearer strokes and they give you a breather between letters. The downside of caps is that you start and finish typing each letter, which means possible clumps of coverage (remember that starting and ending is when you have the least control over the amount of coverage that falls).
In the case of drawing lowercase letters, you need to have a large control of the sleeve or gun and a comfortable position guaranteed for a longer period of time... because once you start, the ideal is to continue linking the stroke and letters until the end of the drawing. word. The tricky part is writing well-drawn letters, but you only have one beginning and one end of a word.
- Make sure there are no air bubbles in the sleeve: to do this, pour some of the filling on a baking paper or plate, so that it does not bubble or splash when you write.
- Hold the bag in the most suitable way: ideally you should hold the tip of the tip at 90 degrees and about 1.5cm above the surface you want to draw on (any closer you could touch and damage the surface of the cake, and from further away you won't adequately control where the frosting falls).
One hand should be in the uppermost part of the sleeve (or on the trigger if using a gun), and will be in charge of making the chocolate or couverture fall from top to bottom in a constant and homogeneous way. The other hand should be closer to the tip and should gently direct the stroke. Hold the tip at a 90 degree angle about ½ inch above the cookie or cake and gently squeeze your pipe. Any closer and you could damage the surface; any further and it's hard to control where the frosting falls.

- Apply constant, even pressure , to ensure a steady flow of icing and an even thickness to the stroke you write. The hand that holds the sleeve at the top, it is also important that it is wide open, to accompany all the coverage downwards (and that it does not go up, inside the sleeve, or you will run out of coverage with which to write to half stroke).
- The space between letters and between words must be uniform : otherwise, apart from not being very elegant, it will not be read correctly.
- Start writing more to the left than you think you should: if you have some space on the right because you started more to the left, it will be easy to fill that space at the end with some drawing or detail (a heart, a number , a star...); but if the problem is having started too far to the right or centered, and running out of space to finish writing... that is hopeless.
- Try before! Do several tests. First, show that you draw your message on the cake or cake but without touching it and without pressing the sleeve so that it does not come out, but to get an idea of how your message can be, how big you can make it and if it will fit you or not your initial idea. Then, practice on a plate or on baking paper: get an idea of what area of the cake you have in relation to a plate, or draw a life-size cookie on baking paper, and practice there with the piping bag. Do you fit what you want to wear? Is the mouthpiece correct? Do you hold your sleeve well? Uppercase or lowercase?
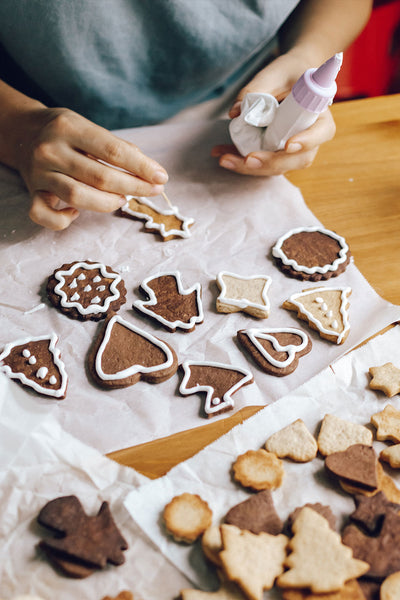
- Have a toothpick handy: A toothpick can help you correct some mistakes, especially with icing or royal icing, you can reposition the icing when it doesn't sit where you want, or remove an extra tip that has come loose from the sleeve.
- After applying the text or decoration, do not move or cover it: let the decoration sit and cool on a flat surface, and do not move it (especially with chocolate, it is easy for it to be liquid and run, blurring the stroke). In the case of cookies especially, do not lift them vertically. Do not apply a film to cover it either, it would touch the text and blur it, taking part of the icing or chocolate with it when it adhered to it.
I hope these little tips will help you perfect your writing and decorating cakes, pies and cookies. And don't forget to go through the post "How to make cookie icing: recipe and tips" to round off the experience.
Source: Pastry Professor Carolyn Grillo of ATK Reviews and Dan Souza, chef at ATK.


